|
||||||||||||||||||||||||||||||||||
| ANGLES RELEASE BUILD 1300 | ||||||||||||||||||||||||||||||||||
| September 15 2025 | ||||||||||||||||||||||||||||||||||
🐞 Fixes and Tweaks 🛠️We have been working our tails off on doing a bunch of playback optimizations and export / import work. 🔧 Updated left and right arrow keys frame stepping for collections. 🔧 Updated collection movie starts for the composer. 🔧 Improved movie starting and stopping in the timeline. 🐞 Fixed an issue with drawing composer clips if zooming was out of range. 🐞 Fixed deleting stars from composer clips. 🐞 Fixed a problem where the duration of Standalone movies was not correct when collection angles had start time offsets. |
||||||||||||||||||||||||||||||||||
| ANGLES RELEASE BUILD 1299 | ||||||||||||||||||||||||||||||||||
| August 27 2025 | ||||||||||||||||||||||||||||||||||
🐞 Fixes and Tweaks 🛠️🐞 Fixed an issue where clips could be skipped in the Composer or Timeline. We have only recently seen the issue in the latest macOS releases. 🐞 Fixed a problem where new angles could not be added if all angles were removed from a collection. 🐞 Updated the positioning of overlays for ‘Create Standalone Movie’ when the ’Single Angle’ dialog option is on. 🐞 Fixed a problem with the ’Split Clip At Playhead And Insert Picture Clip’ menu item for French translations. 🐞 Switched main menu item text ‘Copy Clip Playhead Is Over To Existing Composer Topic’ and ‘Copy Selected Clips To Existing Composer Topic’. The shortcuts were doing the right thing, but the menu text was swapped around. 🛠️ The default state for the checkbox ‘Create New Window’ in the ‘Create New Vault’ dialog has been set to off. 🛠️ The default state for the checkbox ’New Window’ in the ‘Create Standalone Composer Archive’ dialog has been set to off. |
||||||||||||||||||||||||||||||||||
| ANGLES RELEASE BUILD 1296 | ||||||||||||||||||||||||||||||||||
| August 6 2025 | ||||||||||||||||||||||||||||||||||
⚡️ Efficiencies and More Efficiencies ⚡️We are working on issues related to the new importing and exporting routines. This build fixes some issues where clip exports from the composer could silently fail. Also, this may address other issues encountered. Improved the efficiency of transcoding and standalone movie procedures where movies contain video tracks with multiple media sizes. This is especially helpful when importing Foldered Composers. 🌟 The notes popup dialog now is submitted and closed when Return is pressed. To insert a new line use the Enter key which is FN + Return on most keyboards. 🛠️ We moved temp working folder to the user's home vault to help resolve potential permission problems. 🛠️ When clicking and dragging on a composer clip, if the composer is playing, the playhead will not move until the mouse pointer has shifted at least 3 pixels either vertically or horizontally. This makes it easier to click on a clip in a composer without moving the playhead when the composer is playing. 🐞 Fixed a problem with ‘Create Standalone Movie’ that resulted in the message ‘Failed to make final movie.’ 🐞 Fixed a problem where video data for an angle could be unnecessarily duplicated when copying collections. 🐞 Fixed Remove Qualifiers For Selected Clips in composer. |
||||||||||||||||||||||||||||||||||
| ANGLES Build 1290 | ||||||||||||||||||||||||||||||||||
| July 21 2025 | ||||||||||||||||||||||||||||||||||
🪩 Finally A Public Release! 🪩Thanks to everyone for their patience while we have toiled away on a lot of important front and back of house feature and stability work. The next traunch of work has begun: Filter Formula Functions. Our initial goal is to create simple arithmetic operations and percentages using filter formulas. A function's output will be able to be displayed on a markup button, table cell and in a movie collection overlay. These objects will also be double clickable to play clips. This update requires us that the minimum supported macOS is now 13.5. And Apple has released some new features related to movie exports that can only be used when running macOS 15.5 or greater. So, please update when you can. 🎨 Telestration IntegrationThe bulk of our work through this quiet public release period has been related to integrating with third party telestration software. The bulk of the work has been done in cooperation with RT Software. We want to thank them for sharing licences of Tactic and work done on their side to make the integration as seamless as possible. The critical development in this work is that we cracked the Apple code to allows us to set the frame rate and limit the bitrate for movie imports and exports! This is something we have wanted to implement for a long time. Telestration software tends to be rather rigid and requires exact FPS, so now you can send clips to telestration software that will load without errors. To show the telestration dialog, right click on the composer export button in it's toolbar and select ‘Telestrate Clips'. The floating dialog is an interactive dialog that shows various details about clip status in the composer and clips that have been exported to the telestration software. To send clip movies for telestration, select clips in the composer, then click the ’Export Clips' button. This will send the clips to the Path that has been configured in the Telestrate plist settings. Please see below and ask us for help with these settings. Currently, if you run RT Software's Tactic software, Angles will detect their watch and layoff folders, then sets everything up with zero configuration. The settings are loaded from Tactic's ini configuration files. In the case for Tactic, a movie for each angle in selected clips is exported to the RTSW ‘Clips’ folder. These movies have a specific naming convention, ensure the original file name details in the square brackets are unchanged. Also, be sure to use the same name when you render the clips out, otherwise Angles will not be able to import them back into the composer. To import the telestrated movies, make sure the destination composer has been selected and its name is showing in the first line in the Telestrate dialog, then click ‘Import Rendered Clips’. Importing the rendered clips, creates a new movie collection, so be sure you include this when sharing the composer. This might be unexpected behaviour, but has many advantages, the biggest one being that you can link a timeline to it! Also, this approach is very straightforward from a development point of view as it just another movie collection that clips are pointing to. To switch between the telestrated video and the original clip video for selected clips, click ‘Hide’ and ‘Show’ in the Telestrate dialog. Clear Rendered Clips will delete all rendered movies in the Tactic layoff folder. When exporting clips and transcoding, be sure to match your source framerate, there is no reason to choose 50FPS if your movies are 25FPS. We recommend using 6Mbit/s, but increase this if the quality is not optimal. Again, there is no reason to increase the bitrate above what your source movie bitrate. An angle is not exported for telestration if the angle arrangements for the clip are locked, and the angle is completely covered by another angle. Only the flicked in and locked angle will be exported. The Clip Margin Seconds adds a little padding to the beginning and end of the clip when it is exported. This give a little extra movie to work with in the telestration software. Alternate paths to the SOURCE and RENDERED folders can be specified in ‘Preferences < Telestrate < alternate SOURCE and RENDERED paths.plist’. If this file does not exist, it is created as the ’Telestrate Clips’ dialog is opened. Edit this plist to specify the required paths. The next time the ‘Telestrate Clips’ dialog is opened, if the paths in this plist are valid, then they are used. The default CLIPS folder is set to '~/Movies/Angles/Telestration/Source Clips’. The default RENDERED folder is set to '~/Movies/Angles/Telestration/Rendered Clips’. If these default folders do not exist, they are created when the Telestration dialog is opened, or when ‘Export Clips’ is clicked. If the extra movie collections are not desired, create a standalone composer archive to compile all the movies into one movie collection. 🎞️ External Movie Composer ClipsThe work we did for telestration required us to add a second type of movie collection when importing image files. In order to support adding notes, etc. to clips created by images or dropped in movies into the composer, we now create a clips collection. The main reason we did this was to make downstream workflows work more smoothly. When a movie file is dragged to a composer, the movie can be transcoded as it is imported. The clip inserted in the composer for this file can be created as a conventional composer clip movie resource, or as a normal clip movie. A clip collection is created for clip movies. When a picture file is dragged to a composer, the pictured can be encoded into a movie as it is imported. The duration of the movie can be set. A clip collection is created for the picture movies if one does not already exist. When editing the length of a composer clip, If the end of the clip is dragged beyond the end of the longest collection angle linked to that clip, as editing finishes, the end time of this clip is set to the longest collection angle. A menu item, ‘Convert Movie And Picture Resources To Clips’ has been added to the Export button menu in the composer toolbar. This menu item converts picture and movie resource clips to normal composer clips which are linked to the composer clips collection. This helps convert images and movies using the new transcoding routines. This is ultimately the features that will help push content to Amplify! 'Do Not Show Until Relaunch’ checkbox is at the bottom of the import dialog. If this checkbox is selected, after relaunch, this dialog is shown the first time a picture or movie is dragged to a composer, otherwise it is normally not shown. The dialog will reappear after the next relaunch, or if the command key is held down and a picture or movie is dragged to the composer. When this dialog is shown, it is positioned below the clip destination topic, if there is available screen space. Pressing the ESC key cancels the current import process. When importing images, we still allow the image to be imported as a picture, the way this process worked in previous builds. However, we don't really recommend this moving forward. 🛬 Transcode Movie During ImportFrom the work we did to transcode movies for telestration, we added options to transcode movies when dropped into a movie collection. This is critical to do if you are using downloaded content from likes of Wyscout. The nice thing about transcoding on the way into Angles is that you don't need to do it later like when exporting for telestration purposes or using cut clips. We strongly recommend using this feature! 🚀 Standalone Clip Movie Exports 🚀Compeletely revamped the standalone timeline and composer movie export. It now supports features similar to Cut Clips. Added the following options to the export dialog:
When qualifier names are added to file names for cut clips and standalone movies, the qualifier names are added sorted by the time of the qualifier in the clip. The timeline menus ’Single Angle Export With Notes’ and ’Single Angle Export With Notes Settings’ have been hidden, but they can be shown by holding down the Option key while clicking on the timeline progress icon. We recommend 6Mbps for 1920x1080 and 4Mbps for 1280x720. These will be the defaults in a future build. Be sure to check your frame rate when importing. If your movie is 25fps don't choose 50fps and vice versa. 📼 Standalone Composer Archive Update 📼We re-worked the standalone composer archive routines when adding additional clips after the archive creation. Padding movies for angles use the default image ‘empty angle image.png’ in the Preferences folder. 🛠️ Matrix and Composer UpdatesCopy clips to composer menu added to matrix. Right click on a cell or selected cells to copy clips to a composer. Double clicking on a matrix cell selects the linked timeline or composer, selects the linked clips and begins playback of these clips. Changes have been made to composer clip selection to handle playing composer clips from a matrix, and to enhance composer usability. Composer tabbing updated to better handle tabbing with unselected clips. When a composer topic is deleted, the playhead is moved or removed if required. If the composer playhead exists, then clicking on a clip in the composer does not move the playhead. If the composer playhead does not exist, then clicking on a clip in the composer, shows the playhead and positions it at the click point. If a single clip is selected, the tab key moves the playhead to the next clip in the composer, selects this clip and deselects the previous clip. If more than a single clip is selected, the tab key moves the playhead to the next selected clip. 🛠️ Filter Formula UpdatesWhen a timeline or composer tab bar is clicked with the Option key held down, the formulas in the last selected Formulas table are executed. Formulas that search for attribute categories paired with attribute names, check all attributes in the qualifier. Previously, only the first attribute matching the attribute name searched for was checked. Added clip count to the Filter menu icon in the Timeline and Composer main toolbars. When filter formulas are applied, the count is updated. Left clicking on the count will clear the filter. Right click will expose the Filter menu. ‘Insert A Row’ menu item added to tables. This makes it easier to add filter formula rows. Tables remember the vertical offset between sessions. Formulas that search for qualifier categories paired with qualifier names, check all qualifiers in the clip. Previously, only the first qualifier matching the qualifier name searched for was checked. When cells are copied in a table, the contents are also copied to the pasteboard as plain text. This assists copying the table contents to other applications. When a timeline tab bar is clicked, the formulas in the last selected ‘Formulas’ table are executed. Thanks to Brentford for sharing data to help with fix issues due to their extensive usage of Formula tables. 🛠️ Filter Formula Table UpdatesDouble click on a row title in a formula table to select linked clips and play movies. Editing table row names and column names is similar to editing timeline row names. Three menu items have been added to the right click menu for Formula Tables row titles:
Terms and operators in formulas in the colour token view can be replaced by right clicking on these terms or operators. When double clicking on a row title in a formula table, the timeline or composer selected for playback becomes the focus. To execute all formulas in a formula’s table, select the menu item ‘Execute All Formulas’ from the table row’s menu. 🛠️ New Show and Hide FeaturesThe capacity to hide timeline rows and composer topics without any filtered in clips can be set for each timeline or composer independently. Previously this state was global and could only be turned on or off for all timeline or composer views simultaneously. A rows information strip has been added to timelines and composers. Click on the ‘Hide On’ or “Hide Off’ text in this strip to turn row or topic hiding off or on. More information and functionality will be added to this strip in the future. Row and topic hiding responds to clicks in the row name of formula tables. 🛠️ Don't Save Live Clips While MarkingWe added an option called 'Don't Save Live Clips'. When this feature is on, by default, clips that are actively marking the timeline are not saved or exported. We recommend turning this on when exporting JSON timeline to Piston. This feature can be found in the Timeline Export menu. 🛠️ Legacy XML Import LIVEAdded support for importing Legacy XML files using the Set Data Import Folder feature in the Options menu of the timeline. This is the same feature used to import our JSON timelines from Piston, Angles and other sources live. 🛠️ Minor UpdatesWhen creating a standalone composer archive in a new vault, an existing vault with the same name can be replaced if it contains a single composer and collection or less data. If the vault contains more data than a single composer and collection, it cannot be replaced using the standalone composer archive procedure, and a message is displayed to indicate this. This is intended to help protect additional data that may have been added to the vault from accidentally being deleted. The vault can be deleted using the Finder if required. If an attempt is made to replace the source vault archive with itself, the message ‘Unable to replace the source vault with itself.’ is displayed. The timeline playhead no longer jumps back to the start time of the clip being copied from the timeline to the composer for the workflow ‘Clip > Composer, Up’. Thanks Fozzie Bear! Updated clip details drawing so qualifiers with deleted categories draw in the correct position. Updated row selection and moving rows in the Timeline and Composer. It now works like Finder. Updated drag timeline clip copying with option key. Works like Finder now. A new button ‘Create A New Angle For Each File’ has been added to the collection movie import dialog. This button is displayed when multiple movies are dragged to a collection. This button creates a new angle for each movie file dragged to the collection. Stars are not added to or removed from clips if the command, option, shift or control keys are pressed while ‘-‘ or ‘=‘ is pressed. Updated shift click for composer topics. Added an icon at the top of the content side bar that shows or hides unavailable vaults. This is something that will help keep your windows a bit tidier when vaults are not available. ‘Keyboard Controls.plist’ updated to include modifier keys options. The default keys for Jump Forward are now Shift + ‘>’. The default keys for Jump Backward are Shift + ‘<‘. Added some warnings to help indicate low disk space. The free disk space warning for a vault is now triggered when the free space is less than 10 percent. This default value can be changed by editing ‘Preferences > Vault preferences > minimum free space for vault for warning.plist’. 🛠️ MaintenanceImproved composer clip playback when some clips had start times which exceeded the duration of the movie. Reduced composer clip jumping and skipping for small clips. Added better HLS movie loading procedures and rewrote the Reload movie feature. Added copying tab delimited text from TextEdit and pasting into Angles Tables. Added copying text from Numbers and pasting into Angles Tables. 🛠️ Better Full Screen Movie SyncImproved double clicking on composer clips. Improved video synchronising when clicking between composer clips for full screen videos. Reduced clip skipping during composer playback. Improved full screen and small collection synchronisation when the same collection is open in more than one pane. 🐞 BUG FIXESFixed a problem where the edge of normal collection angles could show if the composer playhead was dragged from a clip with normal angles to a clip showing an external resource movie, and these clips were in different composer topics. Fixed Down>Up action adding duplicate qualifiers. Fixed Shift Arrow clip editing in composers and timelines. Angle flicking required Shift in order to flick using keyboard shortcuts. Fixed registration issue when calendar was not set to Gregorian. Fixed issue when presenting full screen where the initial frame of the movie would be displayed, then when play was initiated the movie would jump to the correct position. This have been fixed against the examples we were provided. We refactored and optimised full screen movie synchronisation when starting full screen and when using arrow keys. If there are any issues, please let us know as soon as you see something not working correctly. Fixed a problem that stopped composer playhead dragging for large composers when a clip was selected. |
||||||||||||||||||||||||||||||||||
| ANGLES Build 1164 | ||||||||||||||||||||||||||||||||||
| June 03 2024 | ||||||||||||||||||||||||||||||||||
🧑💻 TranslationsTranslations can now be added to Angles. French, Spanish, Portugese 🎓 Filter FormulasUnlock the power of attributes!!! We are introducing a new feature for filtering data in timelines and composers. It centers around a new filter language that allows the creation of powerful filter formulas. It works similar to how filters have worked in the past, but there are a few changes you need to know:
The new filtering language uses identifiers to declare the data type to be filtered. Identifiers are wrapped in square brackets with the search following wrapped in double quotes. The following are the available identifiers:
Here are some sample filter formulas with explanations of what they will return.
Two alternate formula views are avaiable: Tokenized and Text. Tokenized view is easy to read as it is very visual with colors. The Text view is for more advanced people that what to see what is going on under the hood. Also, the Text view is required for note searching. Click the ‘Formula View’ button in the Filter Formula toolbar of the Inspector to cycle between the views. 👷♀️ Filter Formula Builder MenuTo quickly build formulas, left or right click on the filter input box to show the builder menu. The builder menu displays all qualifier, attributes and rows from the last selected timeline or composer and the last markup. The menu can be scrolled and by typing characters the list can be reduced to items that have those characters in them. Pressing Escape exits the truncated list and will show all items in the list again. If a filter item exists in the input box, selecting another item in the builder menu will append the chosen item with the AND operator. The default formula operator can be set by clicking on the operator icon in the inspector. To change the default formula operator without inserting it into a textview, hold down the option key and click on the operator button. 🦸♀️ MarkUp Button FormulasFilter formulas can be added to a button to display output on the button. Outputs include Count, Time or Average Time. The formula can be added in the Inspector in the section below Button Actions. The output is displayed in a box on top of the button. This box can be moved by holding down Control and Option, then click and drag the output box. Use the T button in the Inspector to select a custom font. The formula output is triggered when buttons are pressed down in MarkUp mode and they can be triggered by pressing the Edit mode button in the MarkUp toolbar. An option called 'Show Formula Outputs For Front View' added to the MarkUp settings menu. This menu is found by right clicking on the MarkUp mode button in the MarkUp toolbar. This option executes MarkUp button formulas and updates the counts, etc. when a timeline or composer is selected. 🍽️ Filter Formula TablesA new table type is available called Formulas. This table can store filter formulas that are commonly used. By clicking on the row name, the filter is immediately applied to the timeline or composer. To create a Formula table:
👩💻 Filters Editor TableA new table type is available called Filters Editor. This table allows the sorting, removing and editing of filter forumlas in the filter formula menu. Create an empty table and set the type to Filters Editor in the Inspector sidebar. This directly edits the filter formula list and does not need to be saved. A filter formula can be given an alias or nickname in the Filters Editor table. When the filter menu is clicked in the Inspector, if the formula has an alias, the alias is displayed in the menu. If the alias is selected from the menu, the formula for the alias is inserted into the inspector textview. 🔫 Trigger ButtonsA new type of button has been added called a Trigger button. The Trigger button works like qualifer in clip, but instead of creating filterable data, it fires off an event at the moment the playhead crosses it. There are 3 types of events: Flick (1-8) and Flick To Best Fit, and Flick To Stored Arrangement. Flick (1-8) event can be used to trigger an angle to be flicked into full view. The Flick events will appear in the menu with trailing number (1-8) which corresponds to the angle number in an open movie collection. If there are more than 8 angles, options for more angles will appear. The Flick To Best Fit and Stored Arrangement can be used to trigger all angles to flick out to the best fit arrangement or the default stored arrangement. Triggers appear along the top of the clip like qualifiers. They appear using the color of the trigger button. They can be removed by right clicking on the clip or row name and choosing Remove > Triggers From Selected Clips. The last trigger to the left of the playhead can be removed by choosing Remove > Last Trigger. Flick Triggers can be added live while marking the clip in the timeline, which will cause the angle to flick. To disable this behaviour, right click on the MarkUp Mode button in the MarkUp toolbar and select Disable Triggers. Adding triggers in Qualifier Mode is supported too. Triggers can be added manually by selecting the clip in the timeline or composer and adding them using the Add Trigger menu option in the Trigger Editor of the Inspector. Trigger timing can be adjusted by holding down Shift and right click drag over the trigger time in the Inspector. This is the same as adjusting Qualifier times in the Inspector. Triggers will be included in the Standalone Composer Export. There is an option to ignore them in the export dialog. 📐 Updated Angle ArrangementsWe are replacing old routines for managing angle arrangements in order to make things more efficient, flexible and useful for future features. There are now 4 options for single dominant angle arrangement and 4 options for double dominant angle arrangements where the rest of the angles are arranged to any side: Top, Bottom, Left or Right. There is an option called Best Fit Grid which works like the Average Angles feature, but organises the angles according to angle number whilst fitting them as neatly as possible in the movie collection space. And lastly, there is an option to arrange by rows according to the number of angles in the collection. To access these options, right click on the movie collection and go to Arrangements in the menu. Pressing Option 0 will cycle through the angles in clockwise pattern and Shift Option 0 will cycle through the angles in a counter-clockwise pattern. We added the ability to cycle angles by the name using a menu. Right click on an angle, choose the angle in the Cycle To menu list. Angle names can be shown next to the angle number overlay in the bottom right corner of the angle movie. Right click on the Numbers icon in the Movie Collection toolbar to set this option. Double clicking on the angle number - name will flick the angle into full view. ↕️ New Sorting OptionsRow category sorting has been added to the timeline row sorting options. Sort Number menu added to the timeline row menu. This feature allows the setting of a custom sort order by assigning sorting numbers to the timeline rows. Each row can be set individually or the rows can be arranged and then the sort order number can be assigned according the current row number. Multiple can have the same sort number, so they can be grouped. Rows without sort numbers specified are sorted to the bottom of the timeline. The sort number is included in the timeline data and will be included in the timeline JSON export. "sort_number" is the new value for a row object in the JSON. If the sort number is included in an importing timeline, the timeline will be automatically sorted by the custom sort number. To compliment, the new sorting options, Sort Number has been added to clip buttons in the MarkUp inspector. Setting the sort number for a clip will add this number to the row while marking. If any clip buttons have the Sort Number and Fill selected in a MarkUp; when MarkUp mode is engaged the rows will be created and the timeline will be sorted by the Sort Number. 🔎 MarkUp Scaling and ZoomingAs our users are creating bigger and more sophisticated MarkUps, we felt it necessary to create an easier way to navigate and view the MarkUp space. So, we added better scaling options and a new way to zoom in and out. To view all buttons in a MarkUp, double click the Scale button in the MarkUp toolbar. Single click and hold to reveal the scale slider. To set the scale back to 1.0, hold down the Command key and double click the Scale button. To zoom in or out on a point, hold down the Command key and use the scroll wheel or trackpad. This is similar to how zooming works in a Movie Collection. 🏹 MarkUp Action LinkingA new option to 'Paste Buttons With Links' is available under the right click contextual menu in the MarkUp. This option will paste the selected buttons with the button action links in tact. This copying behaviour is also the default when using Option click and drag to copy buttons. Command V will not include the links and the option 'Paste Buttons' in the right click will not either. A button can be quickly copied with its links by holding Option then clicking and dragging. This is really useful when you need to create a bunch of qualifier buttons linked to a clip button. Holding down Option while clicking on the Actions button in the MarkUp toolbar will show the linking animation until the Actions button is pressed again. Helpful for studying all the links, plus visually interesting. Quick Drag Button Action Linking! A default button action type can be set by right clicking on the Actions button in the MarkUp toolbar and choosing a default. When the default action is selected, buttons can be quickly linked using the Universal Quick Drag shortcut: Shift Control Option. Holding down this key combo, then dragging and releasing from one button to another will add the button action link in the direction of the drag and release. Try this while running the animations mentioned in the paragraph above. 🛠️ Maintenance and MinorsAdded timeline row and composer topic categories to the inspector. Added an option "Create New Window" in the Create Vault dialog. This includes a window in the vault that is named the same as the vault. Added an option "Export Overlay Stored Pattern" in the Clone Window dialog. This option provides a method to distribute the stored overlay pattern to other Angles users. When this checkbox is on, the stored overlay pattern is saved into the new vault during the export. Later, when this new vault is opened, Angles copies this overlay pattern file into the Angles preferences folder on the destination computer if the modification date of the file on the destination computer is older than the file in the new vault being opened, or the overlay pattern file in the preferences of the destination computer does not already exist. Added a message to switch focus vault when opening a vault by double clicking. Swapped shortcuts for New Vault and New Window. Command N creates a new vault and Control Command N creates a new window. Added custom fonts for markup button names. Shrink to fit text in note and clip details overlays. Overlays menu has been re-organized to make turning on and off overlays quicker. A new option called 'Apply Stored Pattern To Composer Collections' has been added to the Overlays menu. When this option is selected and an overlays pattern has been stored using the 'Store Pattern' feature, all movie collections included in the Composer will display the stored pattern. Updated the composer clip cursor dragging. When a clip is clicked on in the composer, and the playhead is dragged, the playhead movement is restricted to clips with the same vertical origin as the clip clicked. To allow the composer playhead to move freely when dragging, right click on the composer play button and select the menu item ‘Allow Free Dragging’. By clicking in a composer topic, but not on a clip, free dragging will also work. Importing legacy XMLs into timelines no longer deletes rows without clips, unless the row name without clips is the default row name. Some composers could stop playing when jumping between clips. The Escape key now exits full screen completely, you can use Escape or Command F now. For the timeline JSON export, if the ‘Resave this file every time its source is modified’ is not selected, then the JSON archives are not created. When the menu ‘Clear All Formulas’ is chosen, the message ‘Do you wish to remove all Filter Formulas?’ is shown. Added console log events during registration. Movie time overlays can moved to the right side of the collection. When playback information is displayed the text shrinks. Scaling factors for cartesian values are now applied to the next qualifier when Last and Next option is selected for the attribute. When Merge Clips is selected for a clip button with a negative Time Down, it will merge with proceeding clips to create a single clip instead of cutting off the start time of the proceeding clip. The opacity of the Movie Time and Timer Clip backgrounds can be set indepentantly. Updated row and clip selection procedures in timelines. When a row or clip is selected, all other rows or clips are deselected unless the Command or Shift key is down. Tabs can be swapped by holding Shift Control Option, then clicking dragging from a tab to another tab. This is the first step to moving tabs by clicking and dragging. When copying clips in a timeline using Option click and drag, clips are not copied if a clip has the same start and end times. Updated filter formula menus. Timeline row collapsing now uses the row name instead fo the category. When the rows are expanded, the expanded rows are restored to their original position. Overlays are now hidden when editing zooms. When presenting composers full screen, the external movies would only play on the full screen monitor. They now play on both. Updated composer clip transitioning when going from normal clip to external movie. When the playhead is stopped at the end of the last clip in the composer, and the spacebar is pressed, the playhead jumps to the start of the first clip and starts playing. If the timeline is the focus and the down arrow key is pressed, the playhead jumps back to the time that the collection had last started playing. ‘Export File Attributes’ menu added to ‘File’ menu. The output is saved to the desktop and opened. This is designed to help look at possible file permission issues. Play Pauses are copied when copying or moving clips. External composer pictures and movies can now be copied and pasted using Command C, then Command V. MarkUp button type and categories can be edited for multiple selected buttons. Inspector can opened for timelines, markups and composers when presented in full window view. 🐞 BUG FIXES 🐞Fixed editing long qualifier lists in the inspector. Fixed timeline view jumping when clicking in the timeline timebar, when the playhead was not in view. ‘Remove Prefix 0s’ menu added to overlays “Timer Clip Display’ submenus. Hidden overlays are not shown in standalone composer movies. Splitting clips that were copied from other rows works as expected. Fixed Z-A sorting in Content Sidebar. Fixed Set Zoom To Current View. Fixed Cut Clips when Single Movie For Row and Separate Angles are selected. Stopped timeline row vertical scrolling when inserting or trimming a clip. Movie Collection linking creates and indexed timeline if a timeline exists with the same name in the same vault, not when located in a different vault. Hide or Show Rows By Category works even if the row category is not specified for the timeline rows. Fixed Zoom To Current View when zooming multi-angle movies. The clip count triangles would persist when Option click and dragging very quickly. If a clip button had the Fill option selected and it was deleted, the rows was still created when MarkUp mode was initiated. These rows are no longer created. IMPORTANT NEWSIn order to improve compilation time of Angles in Xcode, 1000's of changes have been made to the code base. In particular, all code relating to menus has been updated. So, if a menu is missing please notify us immediately! To reduce the size of some timelines, the maximum number of deleted clips for exporting and importing timelines has been set to 20 per timeline row. Due to all work done with filter formulas, we updated memory protection for timeline data as it now being used in so many ways. |
||||||||||||||||||||||||||||||||||
| ANGLES Build 1078 | ||||||||||||||||||||||||||||||||||
| October 10 2023 | ||||||||||||||||||||||||||||||||||
🐞 BUG FIX - Disappearing Timelines 🐞We, recently, had a few reports that timeline data was occassionally disappearing. We could not replicate the issue, but based on 3 people telling us about it, we investigated and found a couple possible areas that could be the problem. We suspect that the auto saving was occasionally missing data and saving a timeline with blank row. So, we added a couple of routines that will insure timeline data is not blank before saving. Also, we found the specific code that was creating the problem in rare circumstances and fixed it. | ||||||||||||||||||||||||||||||||||
| ANGLES Build 1075 | ||||||||||||||||||||||||||||||||||
| September 28 2023 | ||||||||||||||||||||||||||||||||||
🎼 Create Standalone Composer MovieIt has been a long time coming! This build introduces our new Composer export. This export is like nothing we have ever seen and it is extremely fucking fast! You think Super Transcoder is fast, well this tops it! It took 3 different approaches to get this right, but we finally nailed it. The new export supports Overlays, Clip Zooms, Multi-Angle Clips, and imported images and movies. It is what we call What You See Is What You Get (WYSIWYG). So, however you have your angles, overlays and zooms setup for a clip, the exported movie will reflect exactly that. There are few options:
The Composer Export menu has been re-organized and legacy exports hidden. To use the legacy export options, hold down Option when clicking on the Composer Export button. 📐 Better Alternate SynchingMany moons ago, we developed an alternate method for synching angle movies. Unfortunately, we found that users struggled with the feature. So, we hid it for the time being. The alternate method is very useful because it allows you to append multiple movies to an angle movie and synchronise them. The main reason for hiding the feature was that the performance on slow machines could be frustrating. While doing some work during the CONCACAF Gold Cup 2023, we found we needed to use this feature to hasten our workflows. So, we did a bit of work to enhance it. To use the alternate synchronisation method, hold down the Option key and click on the Synchronize Angles option under the Arrange menu in the Movie Collection tool bar. To pad the blank sections with the empty angle image, click on the downward pointing chevron menu item in the synchronizer controller at the top of the angle movie. Choose Replace Angle Offsets With Blank Movies, this will close the control and pad the blank sections of the movies. The process of padding out the angle movies can be undone by choosing Remove All Angle Offsets From All Angles found under the same menu. 🍦 Composer Archive PaddingWhilst in same feature area of the angle synchronisation, we added an option to Fill Empty Angles With Image to the Composer Archiving feature. This is a tick box in the Create New Composer Archive Folder. This is selected by default and we strongly recommend keeping it ticked. It pads out any and all empty angle with the image found in the empty angle image folder in the preferences folder. The reason this option is important is that when you used the movies in other software / workflows, the blank movies that Angles creates can cause issues. It will be a must have feature when uploading to our new online platform called Amplify! The Empty Angle Image folder can be found on this path: Macintosh HD/Users/Shared/Angles/Preferences. We recommend dimensions of 1920x1080 for the png image. If another size is used, Angles will try to place the image in the middle with black borders. 🍦 Composer Archive TranscodingOptions to transcode the archive while creating it have been added to the export file dialog. This is a must do operation when sharing composers to our new online sharing platform Amplify. Tick 1080 to include transcoding, this will increase the time that it takes to create the archive. By default, the archiving process concatenates the clip angle movies together without altering them. While this is fast and works great in Angles, this process can cause third party transcoders and players serious issues. So, transcoding the angle movies creates one continuous track that fixes this issue. 🫥 Wyscout Playlist ImportA playlist can be created on the Wyscout platform and downloaded. The playlist download contains separate MP4 files and a simple file that describes the playlist order and MP4 file names. Once downloaded the playlist folder can be dropped onto the Content Sidebar and it will import the playlist; creating a timeline and movie collection. A clip will be created for each MP4 in the playlist and each MP4 will be transcoded during the import. Copy Composer Export / ImportWe created a simple composer export and import to help users who are extracting clips from movies using computer vision algorithms. To start to learn how to use this as an import, we recommend creating a composer with two clips and exporting it. After creating the composer, choose 'Copy Composer To Desktop'. This will create a folder on the desktop named after the composer which will include a folder for each clip exported and an important file named import_settings.json. The import_settings.json file is required for the import. It sets up various aspects on how Angles will import the clips. Read the Notes.txt file for all the possible settings. Each clip is exported into a separate folder that is named 'CLIP 00001', 'CLIP 00002', etc. The naming convention is important as the clips will be sorted alphabetically and imported in that order. We recommend using the default naming convention we have created. Inside each clip folder is a file called clip.json and folders that contain each angle that was exported named 'VIDEO ANGLE 1', 'VIDEO ANGLE 2', etc. The clip.json contains any metadata about the clip such as clip color, topic name, qualifiers, attributes and notes. The structure of this json is very similar to Angle's JSON timeline export. The angle movie name contained in the VIDEO ANGLE folder can be any name, but the folder can only contain one movie. Try changing some of the values in the export like composer name and its arrangement in the import_settings.plist and some of the metadata in the clip.json files, then import the folder. To import the composer, simply drop in on the content sidebar. This will create a new window, composer and movie collection in the focus vault and open the imported composer. ✂️ Cut Clips UpdatesInclude Qualifiers In File Name checkbox added to Cut Clip settings options. Reveal In Finder checkbox added to Cut Clip settings options. Defaults button added to Cut Clips settings options. Reduced the number of digits in the clip index for Individual Movies For Clips for Cut Clips. Changed 'Single Angle Export To VLC' to 'Single Angle Cut To VLC'. 🛠️ MaintenanceTimeline row editing is now included in the undo manager. Thanks to Manchester United for pointing this issue out. Timeline row name column maximum width has been increased, allowing the display of very long row names. Archiving from timeline would not work with fragmented MP4 files. Overlays are dimmed when synchronizing angles. Angle arrangements presets ignore overlays. Notes inspector updated to better show the display options. Overlays are no longer duplicated during Composer Archive creation. Improved frame stepping after movies are paused. Fixed issues with Hudl remote. Made Shift Tab shortcut to jump backwards in clips more smooth. Work on timeline archiving routines. Fixed issue where overlapping sub-menu items could not be selected. Keystrokes are blocked from passing through open and save dialog boxes. Content Sidebar and Overlays menu has been rearranged. Standalone composer movie exports do not alter text colors according to light or dark mode. Added a bunch of new clip styles for our friends at FIFA. WIP - Timer clip archiving from archive updates for timelines and composers. Drag and drop Composer merging updates. Added Start button to the JSON Timeline drag and drop import. Fixed issue when where qualifiers would not import correctly when importing a JSON Timeline. Fixed an issue with timeline row name column widths shrinking. Synergy import clean ups. |
||||||||||||||||||||||||||||||||||
| ANGLES Build 1022 | ||||||||||||||||||||||||||||||||||
| April 26 2023 | ||||||||||||||||||||||||||||||||||
🐞 BUG FIX 🐞Thanks to Max at CA Brive for pointing out another issue from Build 1020. Angle flicking shortcuts caused issues in composer playback. New methods to handle saving files with extensions csv and json. And new method for handling extensions when opening existing vaults. |
||||||||||||||||||||||||||||||||||
| ANGLES Build 1021 | ||||||||||||||||||||||||||||||||||
| April 23 2023 | ||||||||||||||||||||||||||||||||||
🐞 BUG FIX 🐞A big thanks to Max at CA Brive for pointing out an issue in Build 1020. All text exports were not exporting files with extensions. This has been fixed in this build. Also, we made the timer clip clip dots smaller for our friends at FIFA. |
||||||||||||||||||||||||||||||||||
| ANGLES Build 1020 | ||||||||||||||||||||||||||||||||||
| April 22 2023 | ||||||||||||||||||||||||||||||||||
🔮 Future Proofing 🔮We have begun work on a new movie export feature that is based on what you see is what you get. So, if you are have overlays being displayed and clip zooms running in a clip, the export will render those into the movie exactly as they look in Angles. In our preliminary experiments, we found that it is best for us to drop support for macOS vesion below 11.0.0. So moving forward, Angles will only support:
In this build, we added routine to the automatic software updater that will check the local running operating system and not allow Angles to update if the OS is less than 11.0.0. This insures no one will accidentally update if their OS is not supported. Minor FeaturesAdded a new menu to the bottom of the Content Sidebar that allows control of the inclusion of timelines, movie collections, markups or composers. Simply, select the content types that you want displayed. Audio capture preview can be enabled by editing the preference file ‘Audio Capture Preview.plist’ in the 'Capture Settings' folder of the Angles preferences. Once enabled, an audio level icon will show in the toolbar of the capture view. The audio level of the capture preview is set to 0 each time Angles restarts. |
||||||||||||||||||||||||||||||||||
| ANGLES Build 1017 | ||||||||||||||||||||||||||||||||||
| April 13 2023 | ||||||||||||||||||||||||||||||||||
🛤️ Back on TrackWe really hate when we release a version after so long and we find that we missed a few things 🤦. Thanks to everyone reporting to us. We are finally back on track to a quicker release cycle! In build 1000, we created a conflict with Quick Jump and Move Clip Time shortcuts. The Quick Jump keys are ignored if Shift, Control, Command or Option keys are down. This fixes an issue reported by 💑 Alyson Annan. Added a Full Screen button in the Timeline and Composer toolbars. Pressing this button will send the linked movie collection to full screen. Right clicking on the Full icon will allow the setting of the connected screen to present the full screen video. This really helpful when there are 2 or more connected screens. Again, thanks Al 🥰 !!! With the introduction of the Movie Collection Overlays, there are some behaviours in the Notes overlay that we did not bring across. This build brings those across and with the following options:
🗒️ Enhanced Note StylingDefault note fonts can stored, applied to existing clips and removed. Holding down Command and right clicking on some selected text in a note editor text box will pop up a menu with the following items:
📹 Capture Movie CollectionWhen capture is stopped using the Record button, all Markups are set to Edit mode. Capture movie time is now displayed in the capture collection. The background has been changed to red with white text. It behaves like a movie timer overlay, so opacity and size can be easily changed. Capture sessions give priority to angle numbers when pairing capture and playback angles. If the Record button is pressed, and a suitable playback video collection could not be found, capture will not start. The following message is shown: ‘Could not find a suitable Movie Collection to link to capture. Please create a Movie Collection.’ When the Movie icon in an empty pane is clicked on with the Option key held down, a Capture tab is created. This is super handy if you create your own capture Super Tabs. Capture Collection Overlay arrangement is remembered and applied to New Capture Collections. This overlay arrangement is stored in 'default capture overlays pattern.plist’. 🧼 Minor CleanupsWhen the Escape key is pressed, exiting full window mode is given priority over other Escape key operations. This is helpful when using Full Play mode and MarkUp mode is engaged while clip buttons are down. When a clip jumps to play in full window, pressing Escape will exit full window, pressing Escape a second time will cancel all buttons that are down, marking the timeline. Home Vault and focus vault updated. Vaults with the name 'Home Vault.AVault’ in the user's Movies folder are given priority as the home vault. Mat Knight, our amazing 🦘 support man, found a spot where we missed changing the word folder to vault in the Content sidebar. Fixed it finally after 6 or so reminders 🤣. When an Angles JSON timeline is dropped onto a timeline where clips exist, a message is shown asking if the imported clips should be appended after the current playhead location. This allows the appending of multiple timelines in one timeline. Timelines can be joined without movies, a new menu item called 'Join Timelines Ignoring Movies' has been added in the Files List of the Content Sidebar when multiple timelines are selected. Choosing this option creates just a timeline not linked to a movie. The procedure to calculate the free space on a volume has been updated. This fixes issues when archiving or sending a standalone composers to some network storage devices. To assist trouble shooting this problem; holding down Option and right clicking on the window name will show four different methods for calculating free space for the volume that the window is stored on. |
||||||||||||||||||||||||||||||||||
| ANGLES Build 1000 | ||||||||||||||||||||||||||||||||||
| March 9 2023 | ||||||||||||||||||||||||||||||||||
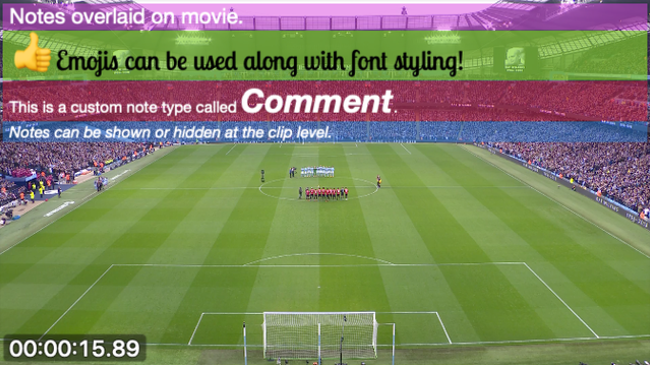
🫧 Overlays and Cartesian Upgrades 🗺⚠️ Not Backward Compatible ⚠️If you upgrade to this build, be aware that all systems should be upgraded to this build or greater. The overlays will appear as blank movie angles in previous builds and might cause other issues. It has been a long time since we pushed out an Angles update. There are quite a few reasons for this, but the biggest reason is that we built a new way to display data in the movie collection. We created a new feature called an Overlay. An overlay is an object in the movie collection that displays timeline and/or clip data. It that behaves like a movie angle that can be can be resized and moved any where in a movie collection. 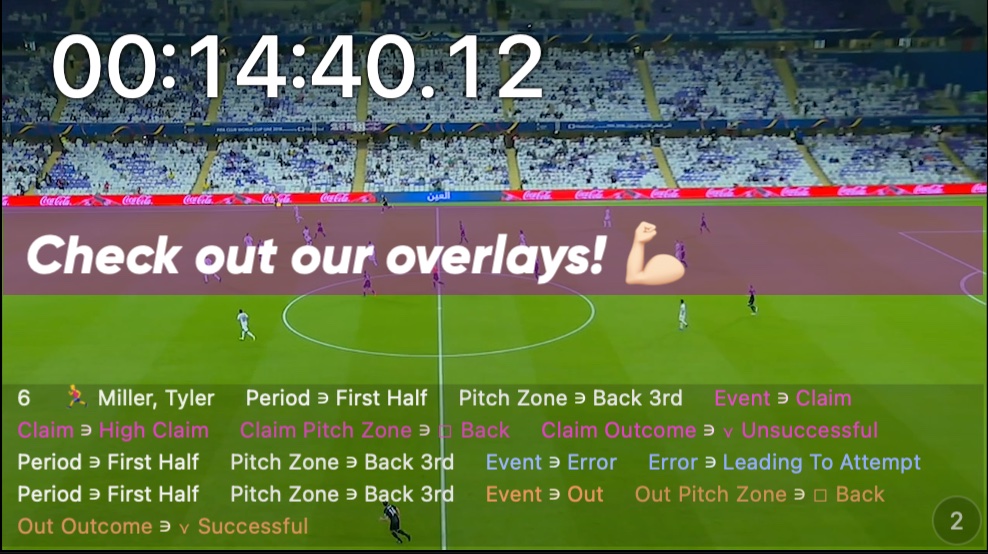
We are genuinely excited about this work as it is the first step to building our vision for the interactive video dashboard. The overlay is a cool object because it was built to support displaying visual data such as counts, pie charts or line plots. To start with, there are 4 types of overlays in this build:
To add an overlay, right click anywhere in a movie collection, navigate to the Overlays menu option and select one of the Show options. To move an overlay, hold down the Option key and click and drag in the middle of the overlay rectangle. To resize an overlay, hold down the Option key and click and drag from the edges or corners of the overlay rectangle. To change the opacity of the overlay, hold down the Command key and scroll up and down over the overlay rectangle. To change the size of the text in a Clip Details or Note overlay, hover over the overlay scroll up and down over the overlay rectangle. To remove an overlay, right click on the overlay rectangle and choose Remove. All overlays can be removed by choosing Remove All from the Overlays menu. Overlays can be quickly toggled on or off by choosing View > Toggle Overlays from the main menu or pressing Option Command O. The overlay pattern can be stored and applied to other movie collections by right clicking anywhere in a movie collection and choosing Store Overlay Pattern from the Overlays menu. This pattern can be applied to any movie collection by choosing Apply Stored Overlay Pattern from the Overlays menu. In the future, we will add the ability to have multiple patterns! Shift Option Command O is a shortcut to apply the stored overlay. When creating new movie collections, the stored pattern can automatically be applied by turning on the Apply Stored Pattern To New Movie Collections in the Overlays menu. We cannot guarantee that the stored overlay pattern will work across all movie collections when varying numbers of angles are present or angle arrangements are different. We have a best fit algorithms, but it might not work out what you want automagically 🔮. Please let us know if there are situations where it is misbehaving. Overlays can be a little bit fiddly to adjust, so there are 8 options in the Overlays menu to help adjust the layout of the overlay rectangles.
The details displayed in the Clip Details overlay can be toggled on or off in the Visuals menu in the main window toolbar. The options are:
Watch to learn more, screencast run time is 05:44 minutes. ⏱️ Timer Clip OverlayWatch to learn more, screencast run time is 05:13 minutes. The Timer Clip has been an option under the MarkUp button type since build 596, but only used by a few data experts to calculate match time for events by parsing Timeline JSON files. This button type creates an alternate timer that can be used to provide secondary times for the timeline and clips. For example, this type of button can be used to provide the official time of a football match; covering both halves. If a timer clip exists, the Timer Clip overlay will display the timer clip time of the closest timer clip start time and a clip will automatically grab the timer clip time from the closest timer clip to the playhead, adding it to the clip in the timeline data. The timer clip button type has an option called Timer Offset that can be set in the inspector, this value is minutes. This is helpful when working with multiple segments of time like a first and second half of a football match. You can set two separate timer clips with the same name and different offsets or setup two different buttons that create separate rows for first and second halves. The first timer offset starting at 0 and the second timer offset starting at 45. In some sports, the game clock counts down from a specific time and can be stopped by the officials. So, there are two options to support this: Cumulative and Count Down. When cumulative is selected, gaps between when the timer clips starts and ends will be subtracted from the offset. When Count Down is selected, time will count down from the offset time. For example, in NBA basketball, you might have 4 quarter timer buttons where each is configured with an timer offset of 12, cumulative option selected and count down option selected. If you mark each time the game clock starts and stops, you will be able to calculate all clips and qualifiers timing according to the game time. The way that time is displayed in the overlay can be altered by choosing one of the options under Overlays > Timer Clip Display. The options are:
🗺 Cartesian Scaling and TracingSome of our finest work yet 💪🏻 Finally got back to working on the cartesian feature set. This build introduces two key cartesian features: Scales and Traces. Up to this point, if you were collecting cartesian data, the x and y points were saved as a value from 0 to 1. This is ok, but you then have to translate these values into something more meaningful in the real world. So, we have created the Scale X and Scale Y feature that can be applied to the button allowing you to directly collect the coordinates based on whatever resolution you require. Watch to learn more, screencast run time is 10:49 minutes. This is kind of a tricky one to explain, so be sure to watch the screencast. The cartesian button coordinate system (X,Y) has the origin (0,0) at the bottom left corner of the button, the top left corner is (0,1), top right corner is (1,1) and bottom right corner is (1,0). So, if we want the middle of the button the coordinates would be (0.5,0.5), pretty straight forward, but this is not really easy to wrap your head around when you start getting values like (0.8744,0.3345). This is where scaling comes in! There are two sets of scales you can apply to the cartesian button: Scale X and Scale Y. By setting a scale you can set the minimum and maximum range values along each axis and the step increment between the two. Let's consider a football pitch example: My local pitch is 105m long and 68m wide and I want to capture cartesian coordinates with a 1m x 1m grid resolution. In order to do this, I will set my X scale from 0 to 105 and my Y scale from 0 to 68, and each will step by 1. A step value of 1 for each scale will return only integers in the scale range, thus giving me a 1m x 1m grid on top of the button. Note that my button image is oriented with the goals on the right and left end of the button. Another example might be a basketball half court where your button orientation has the hoop at the top of the button image. If you want to capture with a 1ft x 1ft grid resolution, the Scale X would be 0 to 50 and the Scale Y would be 0 to 47, each step value would be 1. It was really difficult to use the cartesian feature prior to this build as you did not really know where you clicked, so we created a feature called Traces. Traces appear on top the cartesian button, showing you where you clicked on the button. They can appear with Arrows or Dots and Arrow or Dots with Lines. Arrows indicate the direction for which the trace was traveling, dots work well when direction is not important and the lines show connections between the cartesian values. 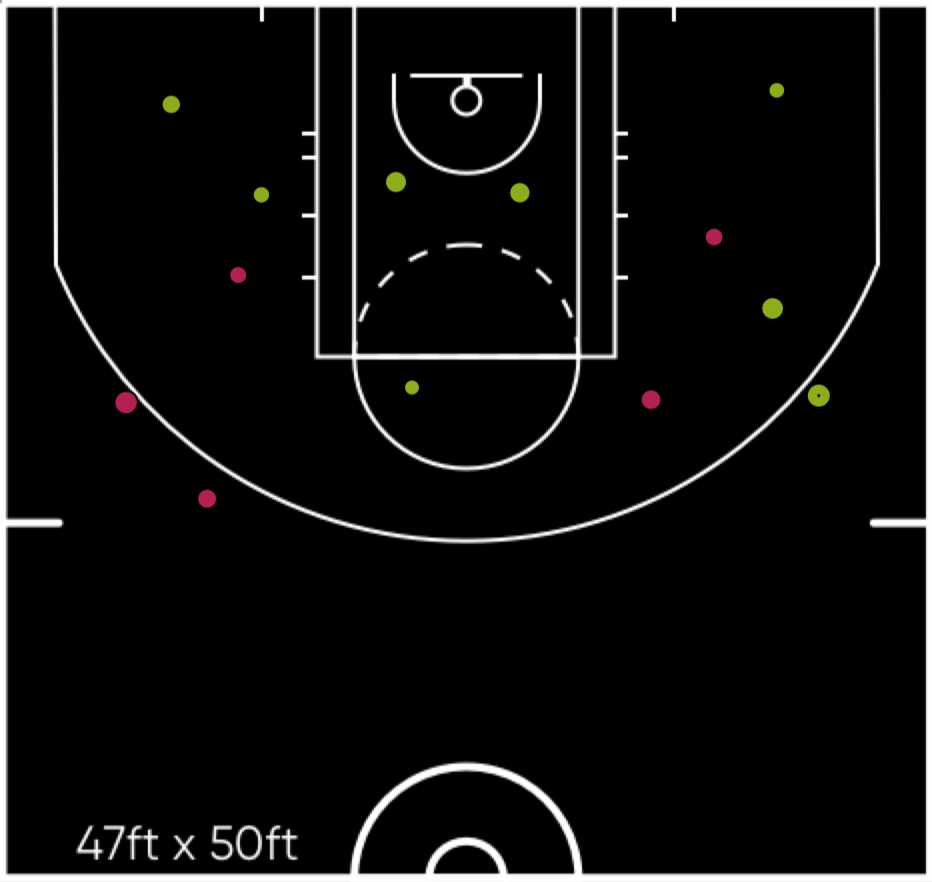
The length of the trace can be set from 0 to All. For example, if the trace value is set to 3 and you click on the fourth cartesian value, the first one will disappear, basically the tail is removed. 
To assist the cleanup of the trace, two new button actions have been added: Clear Traces > Down and Clear Traces > Up. When these actions are linked to the cartesian button and the action is triggered, the trace will be cleared. 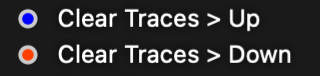
👨🚀 PRO TIPS Hold down Command to use the last cartesian value again. This handy when multiple events occur on the same location. Setting the X and Y range to 0 to 1 and the scale step value to 0 will set up the cartesian button to provide values as it did in previous builds, ranging in decimals from 0 to 1. 🎁 New Minor FeaturesWatch to learn more, screencast run time is 02:26 minutes. ‘Always Add Qualifiers In Qualifier Mode’ right click menu added to ‘MarkUp’ button. When this mode is active a new qualifier can be added to a clip even if the new qualifier is a duplicate. Watch to learn more, screencast run time is 02:13 minutes. To add a qualifier to multiple selected and filtered in clips in the qualifier mode, hold down the Control Command keys and click on the markup qualifier. If the qualifier already exists in any of the selected and filtered in clips, this pre-existing qualifier is removed from these clips. To force this qualifier to add to the clip in this situation, hold down the Option key in addition to the Control Command keys and then click on the markup qualifier button. Remove Duplicate Qualifiers From Selected Clips added to the timeline right click menu. This is a great feature to assist in cleaning up data that has been imported from data providers or other software. Show Notes On Full Screen Movie option added to the Visuals menu in main window toolbar. When this option is turned off the notes overlay will not be shown when presenting movies full screen. Watch to learn more, screencast run time is 03:09 minutes. Multiple angle arrangements can be stored and cycled through by double tapping the 0 key on the keyboard. To store an arrangement, right click on an angle in the movie collection and choose Arrangements > Store Arrangements from the pop-up menu. The arrangement will be stored in an invisible list. In order for a stored arrangement to be applied, the angle numbers must match the angle numbers in the collection. All stored arrangements can be deleted for a collection by selecting Arrangements > Delete Stored Arrangements. Watch to learn more, screencast run time is 01:29 minutes. Markup clip buttons with different categories create different rows in timelines. 🎼 Composer ImprovementsDouble click on topic row header to play the topic. Added abilty to select and drag multiple topic rows up and down. The Command key can be held down to select multiple topics, then the selection can be dragged as a group. The Shift key can used to select a range of topics. Copy and paste using Command C and Command V shortcuts added, so clips can be copied and pasted within a composer or to another one. Pressing Command X will copy then delete the selected clips in the composer. They can be pasted in another topic or topic in another composer. ‘Move’ menu item added to composer right click menu. This option makes it easy to move a clip to another composer. To copy and move a clip in a composer hold down Option C and drag the clip to another topic or another composer. To delete selected rows or topics in an active timeline or composer, press Option Delete keys. ‘Delete Selected Topics’ menu item added to the right click in the composer under the remove menu item. Composer play ’Stop After Every Clip’ and ‘Loop Each Clip’ modes added. These features can be turned on by right clicking on the play button in the composer toolbar. Pressing Tab key will jump to the next clip. Update Filter menu in the composer toolbar, so it behaves just like the timeline. 🪟 Content Sidebar and Window ImprovementsPreviously we called Angles packages ‘Folders’, we have changed this name to 'Vault'. We were all getting confused with Finder folders and Angles folders. Control Command N creates a new vault, sets the focus to that vault and opens the content sidebar. Pressing Command Delete key prompts to move selected items in the content bar to the trash, similar to how Finder works. Added 3 new super tab arrangements:
Valid movie files with the extension ‘.mov’ or 'mp4' can be dropped onto a blank pane without having to first create a movie collection. Legacy XML and Angles JSON timeline files can be dropped onto a blank pane without having to first create a timeline. Right clicking in the Supertab title bar shows the following menus: 👨🚀 PRO TIP - Press Shift Command W to close active Supertab. To join timelines in the order that they are selected in the content side bar, hold down the Command key and select the timelines in the content side bar. Menu item ‘Invert Content Selection’ added to content side bar right click menu. Double click in the Supertab title bar to select content sidebar items in the supertab. Added menu option ’Show Rename Editor For New Views’ to the small tab bars. When this is disabled, the rename editor will not appear. If the Command key is held down and an icon in the empty view is clicked, the tab renaming editor is not displayed. Pressing Option Command K shows the dialog to clone the front window. 🕰️ Timeline ImprovementsImproved timeline row selection and dragging. While copying clips in the timeline using Option drag, the timeline will scroll up or down when the pointer is close to the top or the bottom of the timeline. If a timeline is linked to a collection, a link icon is drawn beside the name of the linked timeline and collection in the small tab. Menu item ‘Play Without Stopping Others’ added to the timeline play button. Turn on this feature by right clicking on the timeline play button. This feature can be helpful in some live workflows. The timeline 'Split Clip At Playhead' feature updates the timeline row clip counter. The timeline row colour is copied during archiving. ✏️ MarkUp ImprovementsClips created using auto up buttons are limited to the auto up duration. Clips created using auto up markup buttons start at the markup button down time and end at the auto up duration, but can be truncated by the Tab key or ‘All Up’ button. A timeline can be exclusively linked to a markup using quick drag linking. Stars can be undone individually in timelines and composers. 🔩 Miscellaneous ImprovementsShort cut keys for angle flicking extended from 6 to 9. Additional angle arrangements have been added for movie collections with 5 and 6 angles. Movie jump shortcuts set to > and < keys. This can changed in the 'Keyboard Controls.plist' along with the jump duration. Archiving updated to better detect failures. When an archive failure is detected, the destination collection and timeline are restored to their state before the archive began. Archiving requires at least 1 GB of free space on the destination volume. HLS menus re-organized, people found them a little confusing. To set the HLS clump size, edit ‘/Users/Shared/Angles/Preferences/HLS/hls.plist’. The maximum and minimum MB values are 5 and 2000. Updating this value should only be done in specific workflows. Added a http failed to load flag to each collection angle. If an angle http file fails to load after 120 seconds then that angle is flagged as having failed to load and no further attempts are made to load that http angle without user intervention. When a failure occurs, a failed to load image is displayed in the angle. Reloading can be restarted using the menu ‘HLS > Restart Failed HLS’. Synergy import ignores In Point and Out Point in the export.csv files. ⚠️ Backward Compatibility CommentsRich Text Format (RTF) data are now saved in the main timeline or composer data files with the key ‘note_text_storage_rtf__json_String’. The aim of this change is to simplify data management. Version 997.08 and later will be able to load the old RTF files, but older Angle versions may be not able to understand the new RTF data. Modifications were made to RTF data displayed in the inspector, pop-down text displays in the timeline and composer, text displays on collections, and merging clips. |
||||||||||||||||||||||||||||||||||
| ANGLES Build 995 | ||||||||||||||||||||||||||||||||||
| April 14 2022 | ||||||||||||||||||||||||||||||||||
🛠 MaintenanceScaled down Markups now register cartesian coordinates properly. Our recommended best practice is to scale your markups to 1 when using cartesian buttons during data collection. 🐞 FixesNew default named Movie Collections were causing issues with capture and archiving. Thanks to Davy at Ajax for sharing this specific example. |
||||||||||||||||||||||||||||||||||
| ANGLES Build 993 | ||||||||||||||||||||||||||||||||||
| April 9 2022 | ||||||||||||||||||||||||||||||||||
🛠 MaintenanceWhen switching a movie collection from HLS to Local, the preference is remembered. 🐞 FixesControl Option Space Bar controls playback of movie globally, in all text inputs. This was previously Control Space Bar, but conflicted with macOS Spaces default shortcut, so we changed it. Control Option Left and Right Arrow controls playback of movie globally, in all text inputs. Right click on Content Sidebar will show the contextual menu in any situation. Using Control and clicking on the name of the window in window title bar will show the contexual menu. When splitting a clip, the right side clip qualifiers could not be edited, they can be edited now. |
||||||||||||||||||||||||||||||||||
| ANGLES Build 989 | ||||||||||||||||||||||||||||||||||
| April 5 2022 | ||||||||||||||||||||||||||||||||||
🪟 Windows and Window CloningWe have added the ability to save a Window and clone a window to a new folder. The purpose of these features are to provide a way of sharing the entire window arrangement in the folder for distribution and ease of use purposes. The Windows list in the content sidebar now includes the folders. When Command N is pressed to create a new window, a window icon will appear in the focus folder of this list. The window can be named by long clicking on the name in the list or by right clicking on the name in the title bar and choosing the Rename Window option. The color of the window title bar can set by right clicking on the name in the window title bar and choosing the Colour option. This colour will be reflected in the icon in the Windows list. The second feature built on top of this is the Clone Window to New Folder. This feature is found by right clicking on the window name in the window title bar and choosing Clone 'Window Name' To A New Folder. Window cloning to a new folder will create a new folder in the chosen location and then copy the window, its arrangement and all open content into the new folder. These are absolutely amazing features, but will require some investigation to figure out how it fits in your distribution workflows. Watch to learn more, screencast run time is 04:03 minutes. 🏋️♀️ Workflow ActionsWorkflow actions added to Clip, Qualifier, and None buttons. Workflow actions stitch together different Angles features into a sequence.
The active clip with the clip cursor over it will be pasted into the last composer selected. In between the copy and paste, a note editor will popup, prompting to input a note for both the clip in the timeline and the composer. The active clip with the clip cursor over it will be pasted into the last composer selected. After the clip is pasted into the timeline, the note editor will appear to input a note into only the clip in the composer. The active clip with the clip cursor over it will be pasted into the last composer selected.
Watch to learn more, screencast run time is 07:30 minutes. To enhance the use of this feature, we added 'Remember MarkUp Mode'. When this option is selected, the markup will open in the last mode which was engaged between launches of Angles. This option can be found by by right clicking on the MarkUp mode icon in the MarkUp toolbar. We suggest using 'Remember MarkUp Mode' with a pre-arranged window. So, when the window is opened, this mode will already be engaged; one less step to do. 📤 Share Timelines, Composers and MarkUpA new option in the Timeline, Composer and Markup toolbar called Share. The Share option uses the macOS Sharing Extension panel so you can easily airdrop, email or message content directly from Angles. The files are zipped up and attached to the sharing extension. There are two global preference options to sharing: 'Share Zipped' or 'Share Without Zipping'. These options can be found by right clicking on the Share icon in the toolbars. If you are sharing via AirDrop, use the 'Share Without Zipping' option, so the recipient does not have to unzip. When sending via email, it is probably best to zip the files, so they don't get rejected or corrupted by an email server.
Watch to learn more, screencast run time is 02:21 minutes. Along with this new feature, we added a Copy Composer To Desktop which creates a composer package on the desktop with a shiny new icon. This is not to be confused with a Standalone Composer Archive, this option only copies the composer data including the images and dropped in movies, NOT the collections linked to the clips. A composer file can be added into Angles by creating a new composer then dragging and dropping the file on top. This will merge clips into the open composer too if you are dropping it into an existing one. 🍒🍨 ImprovementsFiles can be dragged and dropped into empty panes directly.
Watch to learn more, screencast run time is 04:25 minutes. New timeline, composer and markup file icons. The Attribute Editor table was created for attributes, not qualifiers. But, some friends like using this table and wanted to add qualifiers to a clip too. 💡 So, we enhanced the Attribute Editor by adding a feature to create a new qualifier based on an existing one. Right click on an attribute row name and choose ‘Insert Empty Duplicate Qualifier’, a duplicate attribute row is created with a new qualifer that can be edited. The Attribute Editor updates as selected clips are played. If you double click on a row name, the attribute editor will show all the contents of the clip being played. 'Slip Selected Clips' triggers the JSON Export to update. Tabbing from clip to clip synchronizes playheads for all linked timelines. Dragging the playhead right in an unlinked timeline increases the available timeline times. Holding down Option increases the speed of this process. Pause Movies option added to Up / Down Note clip buttons. Split clip and annotate features available for movies dropped into the composer. Network file loading enhancements. Rectangular clip selection added to the timeline as default. Hold down Command, then click and drag to select clips. To use old select lasso tool, hold down Option Command. Control Space Bar in a note editor will play or pause the video, allowing you view video while inputting text. 🐞 FixTab and Shift Tab shorcuts to bounce along clips in a composer stop working in certain situations. |
||||||||||||||||||||||||||||||||||
| ANGLES Build 944 | ||||||||||||||||||||||||||||||||||
| December 3 2021 | ||||||||||||||||||||||||||||||||||
|
Deleting qualifier attributes in the linked Attribute Editor table trigger the JSON timeline export. |
||||||||||||||||||||||||||||||||||
| ANGLES Build 943 | ||||||||||||||||||||||||||||||||||
| December 3 2021 | ||||||||||||||||||||||||||||||||||
|
Timeline row UUID is created when clip buttons create a new row. If Command Option Control E is pressed and the export directory for that timeline has not been specified, then the export JSON dialog is displayed. If Cancel is clicked in the JSON Export dialog, the export path for the timeline is cleared. If Command Option Control I is pressed and the import directory for that timeline has not been specified, then the import JSON dialog is displayed. If Cancel is clicked in the JSON Import dialog, the import path for the timeline is cleared. JSON Export and Import dialog titles updated. 🐞 FixesFinder files were revealed during the JSON imports or exports. Finder no longer opens up the timeline folder. |
||||||||||||||||||||||||||||||||||
| ANGLES Build 942 | ||||||||||||||||||||||||||||||||||
| December 2 2021 | ||||||||||||||||||||||||||||||||||
|
The last JSON import and export path is timeline specific and is stored in the timeline folder. Starring triggers an update to the clip edit time for the JSON export and import. A menu item 'Update Edit Time For Selected Clips’ has been add to the timeline body menu. This menu item updates the last edited time of selected clips for the JSON export and import. |
||||||||||||||||||||||||||||||||||
| ANGLES Build 941 | ||||||||||||||||||||||||||||||||||
| November 30 2021 | ||||||||||||||||||||||||||||||||||
|
'Copy Timeline as Legacy XML Edit List To The Desktop With No Overlaps' export added to timeline Options menu. This export removes overlapping clips. Updated JSON export triggers to include editing, adding and removing qualifier attributes. 🐞 FixesTimelines created using Movie + Timeline Super Tab would not connect properly to Attribute Editor tables. This has been fixed. |
||||||||||||||||||||||||||||||||||
| ANGLES Build 939 | ||||||||||||||||||||||||||||||||||
| November 27 2021 | ||||||||||||||||||||||||||||||||||
|
Two timeline cursors can be temporarily linked to move synchronously. To link two timeline playhead cursors:
This feature is designed to analyse two timelines linked to the same movie. The playhead will move to the same time as its linked timeline. Control Option Command E will export the front timeline in JSON format including the JSON ARCHIVES folder. |
||||||||||||||||||||||||||||||||||
| ANGLES Build 937 | ||||||||||||||||||||||||||||||||||
| November 25 2021 | ||||||||||||||||||||||||||||||||||
|
Notes appear in the Attribute Editor. They can edited, but not created in the editor. |
||||||||||||||||||||||||||||||||||
| ANGLES Build 933 | ||||||||||||||||||||||||||||||||||
| November 18 2021 | ||||||||||||||||||||||||||||||||||
|
Updated timeline row color sorting algorithms to match the expanded color palette. If the timeline is playing, pressing Control Option Command Up Arrow will set the current playback speed as a preference, so that it can be jumped back to by pressing Command Up Arrow. This is great for those users that mark at say 3x speed all the time, set the speed and immediately jump back to it using the shortcut. This goes out to Matilda (My Daughter, 13 year old) 😘. |
||||||||||||||||||||||||||||||||||
| ANGLES Build 932 | ||||||||||||||||||||||||||||||||||
| November 17 2021 | ||||||||||||||||||||||||||||||||||
🌈 Expanded Color PaletteThe color palette has been expanded to 1500 colors to give more resolution for sorting. Updated JSON export triggers to handle qualifier time adjustments. |
||||||||||||||||||||||||||||||||||
| ANGLES Build 930 | ||||||||||||||||||||||||||||||||||
| November 16 2021 | ||||||||||||||||||||||||||||||||||
🎩 Clip StylesClips can be styled with borders by right clicking on a clip and selecting an option from the Clip Styles menu. You might be asking why we added this option? The main reason is all the recent work on JSON timeline imports. If you are importing a JSON timeline, a clip can be brought to your attention by this simple efficient styling. |
||||||||||||||||||||||||||||||||||
| ANGLES Build 928 | November 15 2021 | |||||||||||||||||||||||||||||||||
|
'Export JSON Data’ feature exports the front timeline JSON data to the last export folder by pressing Control Option Command E. Helpful for manually triggering an export. ‘Import JSON Data’ feature imports JSON data into the front timeline from the last import folder by pressing Control Option Command I. Helpful for manually triggering an import. Clips deleted from the source exporting timeline are now deleted from the destination importing timeline following the export imprt cycle. |
||||||||||||||||||||||||||||||||||
| ANGLES Build 927 | ||||||||||||||||||||||||||||||||||
| November 11 2021 | ||||||||||||||||||||||||||||||||||
🐞 Monterey Capture FixWe implemented a fix for capture on Monterey and grappled with Apple's lack of attention to Intel based computers. In this build, capture is working perfectly now on both architectures (Apple silicon and Intel) regardless of operating system version. When running a capture, be sure to set your frame rate to what is coming in from the source. ⚠️ Breaking Backward Compatibility ⚠️There are times while developing software that in order to move forward, you you must break from the past. This build is one of those moments. IF YOU OPEN A MARKUP IN THIS BUILD, THE MARKUP WILL NOT WORK PROPERLY IN PREVIOUS BUILDS! Apologies for screaming at you like that, but it is really important that you read this. We have rewritten the way that buttons are created and drawn in the markup. The reason for this is that our original implementation nearly 5 years ago needed to be updated in order provide better performance and features in the future. This work will be especially important as we start on statistical visualisation features early next year. So, we strongly suggest that you create a backup of your markups. To do this, create an Angles folder, copy all your markups to this folder, then remove the folder from Angles and store it somewhere safe. 🎁 New FeaturesChange 🟪 to 🟣Selected button's shapes can be changed by right clicking on a button and choosing the shape from the Shape menu. Rescale ◻️ to ⬜️Selected buttons can be rescaled by right clicking on a button and choosing a percentage from the Rescale menu. This operation rescales text and maintains all button spacing. 🎭 Image maskingShapes can be applied as masks to images used in a markup. For example, drop an image of a person's face and apply a rounded rectangle by choosing this from the Shape menu. 🕵️♀️ Scale MarkupThe markup view can be scaled, so you can zoom out and see the whole view at once. Click on the Scale button in the markup toolbar and adjust the slider. If you have built a large markup, this feature is insanely useful! 💅 Grid AlignmentA new option to align a selected group of buttons to a grid. To use: Place a bunch of buttons in a rough grid, 4x4 or other. Then, Select the group of buttons, right click on a button and choose Grid from the Align menu. 🧽 Timeline Data Import FolderA new option to import and merge JSON timelines in a folder has been added to the timeline Options menu. To use: choose the "Set Data Import Folder" option in the Options menu of the timeline toolbar, then select a folder for the timeline to look for the JSON timeline files to import. There are two options for importing: Repeat or Single Shot. Repeat will scan the folder every 10 seconds to look for new data to import. Single Shot will import once the folder is selected and then can be triggered manually by pressing the shortcut Control Option Command J. The import process can be stopped by choosing "Cancel Data Import" from the Option menu in the timeline toolbar. 🛠 MaintenanceTimelines connected to live HLS streams would not display properly after 4 hours. Timeline, composer and markup backup archives are compressed to reduce space. Added inspector font sizes: 5, 6 and 7 for markup button name. |
||||||||||||||||||||||||||||||||||
| ANGLES Build 912 | ||||||||||||||||||||||||||||||||||
| October 4 2021 | ||||||||||||||||||||||||||||||||||
🏖 Re-Sort with Merge or MarkupTimeline rows can be set to re-sort when a merge occurs or when a Markup button marks data in the timeline. This is great during live markup to keep the timeline organized. Right click on a timeline row name, go to Sort > Re-sort With Merge Or Markup. When re-sorting is engaged a red circle will appear next to the last sort option chosen and the Re-sort option. 📢 Big shout out to Jorge Garcia at the Seattle Sounders. This feature was his request. 'Move Timeline Cursor To Last Tabbed Qualifier' added to the clip menu with a shortcut Control q. This feature makes it possible to tab to a qualifier in attribute mode, move the playhead to view the movie, then jump back to the qualifier to add attributes. 🛠 MaintenanceImproved qualifier mode performance. Timeline playhead and cursor displays on top of timeline ruler. Updated appearance of timeline playhead when it is dragged to the beginning or end of timeline. Better performance when using large timelines. 🐞 Fixes
The 'windows open.plist' file had space at the beginning of the file name causing synchronizing issue with Onedrive. Proceeding space removed. 🙏 FAW! Case 2384 - Cut clips 'Include Note In The File Name' option in the Composer was not including the note in the name. The note is included in the clip file names. File extension for Angles folders (.AVault) can be left in the name when creating new folders by selecting existing folders. Fixed full screen playback synchronizations from composers and timelines where notes and other content would not appear on the small movie collection. Fixed broken qualifier in build 911. |
||||||||||||||||||||||||||||||||||
| ANGLES Build 907 | ||||||||||||||||||||||||||||||||||
| September 27 2021 | ||||||||||||||||||||||||||||||||||
🎯 Qualifier Mode IndicatorQualifier mode is engaged when Angles is in Markup mode, clip(s) are selected and the clip cursor is on top of one or more of the selected clips. Qualifier mode will insert qualifiers at the clip cursor location in the clip or if Control Option Command is down will insert qualifiers into all selected clips. When this mode is engaged the playhead will display a red bullseye pattern, similar to attribute mode. Remember that the clip cursor must be on top of a selected clip, so either select a clip or move the playhead to location just before the first selected clip and press Tab key to engage the mode. |
||||||||||||||||||||||||||||||||||
| ANGLES Build 906 | ||||||||||||||||||||||||||||||||||
| September 26 2021 | ||||||||||||||||||||||||||||||||||
✍️ Better Clip TrimmingWhen holding down Shift and trimming a clip in a Composer, the playhead moves to start or end of the clip, so the initial frame of the clip is displayed. This works the same as the timeline now. 🐞 FixAfter splitting a timeline or composer clip that contained a note, editing the note of one of the clips that were split would update both the split clips notes. Each clip note is now independent. Thanks to Dave Stewart at Villa for sharing this one. |
||||||||||||||||||||||||||||||||||
| ANGLES Build 904 | ||||||||||||||||||||||||||||||||||
| September 23 2021 | ||||||||||||||||||||||||||||||||||
📐 Better Angle ArrangementsNew Angle Arrangement options that support 2, 3 and 4 angle movie collections. To use, right click on an angle and pick the arrangement. 🏖 'Re-sort With Merge'A timeline option can be set to always re-sort during a timeline merge operation by the timeline by the last sort chosen. The sorting will occur when a new clip is added by the chosen merging timeline. 🍬 Right click on a timeline row name and choose 'Re-sort With Merge' to automatically sort the merging timelines. The option is global and set for all timelines. The last timeline row sort option will have a red dot next to it to indicate that it was the last sort option chosen. ☑ Timelines listed in the Content Sidebar can be merged into another timeline by link dragging from the timeline toolbar link icon 🔗 to another timeline in the Content Sidebar. This is helpful to quickly merge in clips from other timelines. 🐞 FixesFixed Qualifier Tables now show their Cartesian (X,Y) values. Cartesian Qualifier Attributes were not being added to the qualifier properly. Actions link targets removed when using Down or Up Color actions with Private links. |
||||||||||||||||||||||||||||||||||
| ANGLES Build 900 | ||||||||||||||||||||||||||||||||||
| September 18 2021 | ||||||||||||||||||||||||||||||||||
🎯 Qualifier Attribute ModeQualifier attribute mode is similar to qualifier mode, but uses Control Tab and Shift Control Tab to hop through qualifiers in selected clips, allowing you to add attributes. When the mode is engaged the playhead will have a bullseye. To use:
This mode will add the attribute once. If the attribute exists in the qualifier, the attribute is removed from the qualifier. Hold down Option to add multiple of the same attribute to a qualifier. Qualifier mode shortcut to add multiple of the same qualifier to a selected clip has been change from Command to Option. This matches up with qualifier attribute mode better. ✍️ Name File PromptAh, the simple things in life such as naming a file when you create it. Yes, finally Angles prompts you to name newly created files. Input the name, press Return or hit the X to close the dialog. 🛠 General ImprovementsUpdated focus folder icon, so it stands out stronger. Updated content sidebar view mode icons, so they fill when selected. Fixed privately linked attributes with 'Next Qualifier' and 'Last and Next Qualifier', so that the private link is respected. The block action type updated so that buttons that are being blocked can be pushed using mouse, shortcuts, Tab key or the All Up button in the toolbar. 'Ignore Tab' option enabled for None buttons. 'Merge Selected Clips' menu added to timeline row and body menus. If overlapping clips are detected when importing an XML into a timeline, an option to merge clips or not is presented. Optimized file loading from the Content Sidebar. The File View in the Content Sidebar shows all loaded files by default. Newly created files using the Super Tab creation tools in the main toolbar will appear at the top of the File View in the Content Sidebar. Filtered out clips are no longer selectable. BUG FIX: If a folder with the same name is in the Content Sidebar, files would appear in only one of the folders. |
||||||||||||||||||||||||||||||||||
| ANGLES Build 888 | ||||||||||||||||||||||||||||||||||
| August 25 2021 | ||||||||||||||||||||||||||||||||||
🤩 Face LiftIt has been a long time since we had a public release, but finally we are pretty happy with the state of our pre-release build stream. If you are not getting pre-releases, this update is a whopper! The UI has undergone some serious cosmetic surgery that includes new color scheme, new icons and updates in the Content Sidebar. Content Sidebar is the sidebar on the left where folders and files are managed. A menu has been added for changing modes of the sidebar. A new mode has been added called File mode, which will only display files of open folders. The files are sorted by open date, so you can see what was opened last more easily. The Folder mode sorts A-Z or Z-A by right clicking on the Folder mode icon. TIP: Besure to try playing with the Loaded mode in the bottom of this sidebar, this filters in all loaded files. Very helpful for copying files into a new folder. 📦 Stand Alone ComposerTo create a Standalone Composer, choose Standalone Composer from the Composer export menu. This will create a new Angles folder with the composer and movie collection inside the folder, making it 100% transportable. When new clips are added to the composer archive, they are automagically cut and added to the archive. 🔧 Attribute EditorA new table type has been added called Attribute Editor. Create a new table of this type, link to a timeline and select a clip. Each attribute will appear as a row with its qualifier. Attributes can be updated by right clicking on the attribute name cell and selecting the attribute to replace the current one from the menu. Right click on the row header and choose 'Insert Empty Attribute Row'. This will insert a row where a new attribute can added using menu system. Updated attribute last qualifier assignment to handle Qualifier mode. Attribute Editor columns can be moved and the locations are remembered, so new editors will be arranged the way you like. Qualifiers and Qualifier Attributes can be changed by holding down Shift Control Option then dragging from a qualifier or qualifier attribute button in a MarkUp to the name cell in the Attribute Editor. Cartesian X,Y values can be added or updated in the Attribute Editor. Holding down Shift Control Option, then dragging from the location on the cartesian button in the markup to either the Attribute X or Attribute Y cell of the qualifier row in the editor. Qualifier Attributes can be deleted using the Attribute Editor by right clicking on the row header and choosing 'Delete Attribute'. This deletes the attribute from the qualifier, but does not delete the qualifier. Delete the qualifier using the Inspector in the right sidebar. Colors for Qualifiers and Attributes are included in Attribute Editor cells. Qualifiers in the Attribute Editor can changed using the right click menu system. Qualifiers will be included from all open markups or the linked timeline. Attribute Editor updates itself when tabbing through selected clips in a linked timeline. Undo operations are supported in the Attribute Editor. Undo coverage include updating a qualifier or attribute in the Attribute Editor using the click drag method from a Markup button to the cell. Qualifier time can, also, be edited in the Attribute Editor! This feature was suggested by our friend Alessandro Foglino at FIFA. 🍒 🍨 🖌 Updated MarkUp Rules and FeaturesA lot of focus has been put on how the multiple button typs and actions interact. New private linking rules implemented. Privately linked clip buttons now allow qualifiers not privately linked to be added to the clip. Overlap option added to clip buttons. When this option is selected clips with negative Time Down time can overlap proceeding clips. Clips that overlap will be shaded a different color in order to make them easier to identify. This does not change their marking color, it is only a visual indicator. New qualifier option added called ‘Down Time’. This option will add the qualifier to the timeline when the qualifier button was pushed down. This means that the qualifier can be outside of the bounds of the clip; while still being associated to the clip. Qualifier times are not modified when inserting qualifiers into multiple selected clips. When ‘Down Time’ is not set for a qualifier, the down time of the clip button is used if it is close to the current timeline time, otherwise the current timeline time is used. Another new qualifier option added called ‘Clock Time’. This option adds the clock time of the computer to the qualifier in a format like this "2021-05-24 18.17.10.90800". Currently, this data can only be seen in the native timeline or JSON timeline export files. Added support for ’Next Down’ Qualifier -> ’Last Qualifier’ Attribute -> Clip button click sequences in the MarkUp. New MarkUp button actions: "Down > Toggle" and "Up > Toggle". These actions will toggle a button down or up depending on its current state. For example, if a button is down, it will be toggled up. New MarkUp button actions: "Down > Block Action" and "Up > Block Action". These actions will block all actions acting on the linked button. MarkUp button actions can be re-ordered by right click dragging up or down in the empty area next to the action symbol table in the inspector. The order of actions is really important as you have more complex button interactions. Added support for ’Last Up Down Time’ Qualifier -> ’Last Qualifier’ Attribute -> Clip button click sequences. Improved the None button change routines. Improved qualifier and attribute marking behaviors. When an attribute pushes down multiple qualifers the attribute is attributed to those qualifiers. 📼 HLS Localising and Native Capture ImprovementsSerious HLS localising enhancements to insure integrity of download and movie duration of localized movies. HLS localizing errors will be reflected in the color of the download progress circle. If there is an error, the progress wheel color will turn red, but the localizing process will continue by deleting and re-downloading the latest clump of files (100MB) used to create the local movie. Progress and errors are logged to files in the movie collection data folder. This allows us to support you and figure out why the issue occurred. If you see a red progress wheel, WE NEED TO KNOW ABOUT IT!!! HLS menus updated to be more clear in their purpose and state. The live button in the timeline toolbar will push the playhead as close to live as possible when the timeline is linked to an HLS movie collection. Time Down and Time Up button properties can be set to a maximum of 7 digits. When the last down qualifier property is set, the qualifier can now be inserted into a clip after it is fully marked in the timeline. The settings have been more simple. By default, the capture settings will be H264 6Mbps. Be sure to set the frame rate to match what your source format, getting the frame rate right is critical. When you set the framerate, all capture devices will be set to the same rate; this is helpful when capturing from 2 or more devices. Disabled energy settings check for capture. This was causing some users to see an annoying message when starting capture. 👩⚕️ General Maintenance and UpdatesHolding down Shift while right clicking on a mouse will allow the use of the quick drag feature to link things. This is just an easier way than using Shift Control Option to quick link things. "Create New Row From Selected Clips" has been added as an option in the main application Clip menu with a shortcut key Control Option R. Timeline row colour can changed by right clicking on the row number next to the row name in the timeline row. This will change the clip colour for all selected clips. Markups, timelines and composers are backed up internally, this means content can be manually recovered. Some work on reloading movie collections. Keyboard shortcut Control = will reload a master and slave movie collection. 'Export each row' option added to JSON timeline export. This option exports a json file per row using the row name as the file name. The row JSON files are exported to a folder named after the timeline. Blocked mouse events from interacting with the hidden files list in the right sidebar. Overlapping clips are not merged when clips are copied between rows. BUG FIX: Button action link animation would stall when multiple buttons with multiple actions were centered stacked on top of each other. BUG FIX: New movie collections and super tabs not being selected and populated upon creation. BUG FIX: Resizing a split in pane, then clicking and dragging on object like a button or the playhead would cause the pane to resize strangely. BUG FIX: XML files from SportsCode with very short clips and multiple SporstCode labels will import correctly. |
||||||||||||||||||||||||||||||||||
| ANGLES Build 767 | ||||||||||||||||||||||||||||||||||
| December 20 2020 | ||||||||||||||||||||||||||||||||||
🏷 Better JSON SupportAngles JSON timeline files can be imported by dropping onto a timeline. ⚠️ Timeline data updated to remove spaces in tag names, also all tags have been downcased. The effects timeline JSON export, so be sure to update your code that parses the JSON. We updated the rules for MarkUp button shortcut firing. When a shortcut is used to push a button up or down, buttons with Center Fire selected will be fired before buttons with To Front button actions. Center Fire, Hide Name and Show Shortcut options now can be applied to multiple selected buttons. When a single clip is selected and the playhead cursor is outside the clip, the playhead won't jump back. This one goes out the FIFA data collection team!!! 'Equalise Width And Height' animation improved. BUG FIXES:
|
||||||||||||||||||||||||||||||||||
| ANGLES Build 757 | ||||||||||||||||||||||||||||||||||
| December 8 2020 | ||||||||||||||||||||||||||||||||||
🍿 Smooth Transitions ReleaseSmooth Movie Collection Loading This release uses a new seek ahead movie loading routine, so when you play a composer, movies that are not loaded will be loaded on the fly 3 seconds prior to them being displayed. This routine results in smooth transitions from clip to clip when presenting full screen. Better clip tabbing in the Composers. Double tapping Shift Tab to hop to previous clips is a lot less stubborn now. Also, Improved scrubbing of movies dropped into the composer. Multiple selected movies from Finder can be dropped into the Composer. We do our best to keep selection order, but this cannot be guaranteed. Dropping movies below the last topic will create a new topic. ✂️ Cut Clips to VLC has been added to the composer. This can be a bit faster to use as it does not re-encode the clips before sending to VLC. 🏷 Timeline File Format Update We are making some significant changes to the native timeline PLIST and JSON file formats. If you are using the JSON export to drive reporting workflows, it is critical to pay attention to these notes. Please contact us if you need more information. We are removing any spaces in element names to make it easier to parse the data and we are changing some of the names to make the data more clear. This version adds some of the new conventions, duplicating data in order to preserve backward compatibility for those users relying on the JSON export. Timeline row, clip, qualifier and attribute colors saving updated for ‘chron data.plist’. This effects the JSON export too. In the JSON file, you will see:
"color" : "0.1485,0.6151,0.825",
This is red, green, blue; each item is from 0 to 1. We added time_start and time_end to be used instead of str and end for clip times. Versions 731 and later will load colors correctly for previous versions. Versions prior to 731 will not load colors saved with versions 731 and later, unless the tag ‘save old timeline format prior to 2020.11.03’ in the preference file ‘Save.plist’ is set to ‘YES’ when the file is saved with version 731 and later. ⚠️ Timelines Not Displaying Correct Colors Please note if timelines are not showing the correct colors, it is likely because the timeline was saved using build#731 or greater and the timeline is being viewed in an older build. Simply install the latest build to resolve the problem. There is a bit more work to go in this area. The next release will have all this work completed. 🗺 Cartesian Coordinates updated so that the origin (0,0) is located at the bottom left of the button and (1,1) is located in top right corner of the button. ⚠️ Update your formulas! This change was made to make it easier to use simple scatter plots in Apple Numbers, Excel or other data plotting packages. But, if your formulas are not updated the plot will not display correctly. And you may need to run a script over older data to update the coordinates. Contact us if you need help. Interlaced video is automatically de-interlaced in the movie collection. Qualifier Attributes appear in the clip details pop-down when hovering over a clip. Command A can be used to select all text in text boxes. BUG FIXES:
|
||||||||||||||||||||||||||||||||||
| ANGLES Build 730 | ||||||||||||||||||||||||||||||||||
| November 2 2020 | ||||||||||||||||||||||||||||||||||
🙏 No More 🦠 ReleaseThis release goes out to all our football and rugby customers who have been working through the pandemic riddled season. Thanks to Sheffield Utd, Ajax, Aston Villa, Hoffenheim, Barça, CA Brive and FIFA for all the feedback and time spent with us to get our features right. New Mark Up Button Palette and Shapes. We added 6 new button shapes based on ⬟⬢⬣. This allows you to create some pretty fun and creative MarkUps.
Button Color and Mark Color options added to MarkUp buttons. Button color is the color of the button as it appears in your MarkUp. Mark color is the color that will be marked in the timeline as the clip, qualifier or attribute color. By default, button and mark color are set to be the same. Unticking the Same option will allow you to set the button color and mark color separately. So, your button could be blue and mark red clips in the timeline. New Color Button Actions added to MarkUps.
If the Same option is ticked for button and mark color (default), then using button color action will also set the mark color. The same is true if you are using a mark color action. Cut Clips added to the Composer! This feature found in the timeline has now been added to the composer, allowing you to quickly export clips using the variety of output options. Composer topics are treated like timeline rows, you can quickly compile specific topics and dump the clips out using the cut clip options to separate or sequence angles. It supports the inclusion of picture clip and imported movies in the composer. So, try using this feature as the quickest way of exporting selected topics or clips as a single movie. In order to assist in the process of creating content for telestration apps such as Piero, Coach Paint or Tactic, we have added an option in the Cut Clips feature called Prepare For Telestration. This option cuts the selected clips, so that the movies will be editable in these products. We suggest configuring these settings for Cut Clips, then select each topic and run the export. 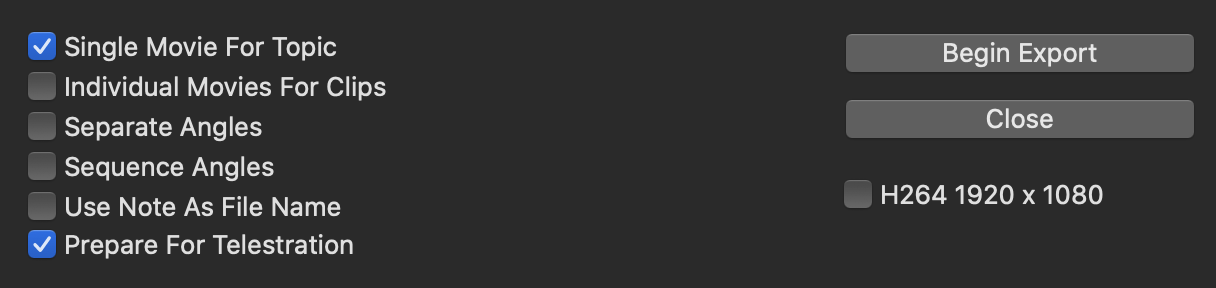
An option that will transcode each clip has been added as well. This option should be used if you run into troubles in the next step of your workflow outside of Angles. NOTE: We cannot guarantee this will always work for your telestration app, we do not have licences for these products, so we are doing our best through the help of our users. Please provide feedback. 🏎 Sidecar Support! A MarkUp will now mark clips in the most recently selected visible timeline with a preference given to timelines that are playing/capturing. So, basically whatever timeline was last clicked on will receive the marks from the MarkUp as long as the timeline is visible.The killer aspect of this is that the MarkUp can be in a separate window! So, if your markup happens to be in a window on your iPad running Sidecar, you can use your Apple Pen or iPad keyboard to mark to the timeline in the other Angles window on your Mac!!! 💃🏼 File Synchronization added for all file types, so you can now have the same file open in multiple Super Tabs or tabs and all will stay in sync. 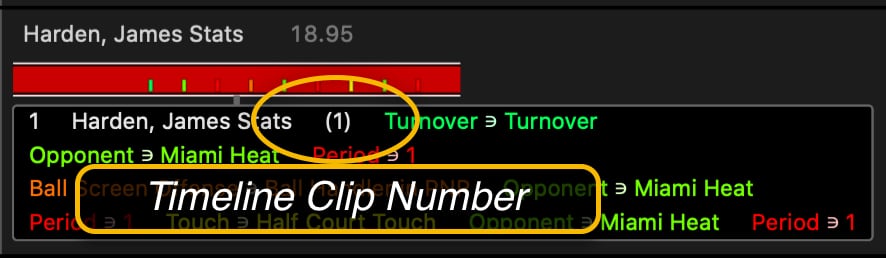
Timeline Clip Number now appears in the clip popup details of the composer. This is helpful when re-ordering clips in the composer. Dual Screen Movie Playback When presenting movie collections to full screen, the source movie collection in the main window will synchronize its playback using up to 30fps rate. The reason for the potential frame rate reduction is to reduce load on the system, making it work on less powerful Macs. Toggle Set Angle Positions for multiple selected clips using a focus clip. The focus clip is the clip where the clip cursor is located in either the timeline or composer. So, select a clip, be sure the clip cursor is in the clip, flick to the preferred angle, then select other clips that you want to use the same angle positions and press Command L. Pressing Command L again will toggle the clip's angle postions back to default. Disable Qualifier Mode When Capturing option has been added to the MarkUp mode option menu. When this option is selected, clips can be selected for trimming or pasting and MarkUp buttons can be pushed down simultaneously. The MarkUp mode option menu is accessed by right clicking on the MarkUp mode button in the MarkUp toolbar. Appreciate Aston Villa for recommending this option! Live Capture Marking can now mark clips against a movie collection being captured on a remote computer according to the remote live capture preview window. This feature is perfect for people marking live against what their eyes are seeing in real time. It, also, allows more accurate merging of timelines. Some of the procedures in this feature will likely require some refinement. So your feedback is appreciated. Option Click Drag Button Copy added in MarkUp edit mode. Hold down Option, then click and drag to make a copy; works for all selected buttons and scrolls the body for placement. This little feature goes out to Hockey Australia will find it handy too! It is very Macish and we love it. Files List Update, the files list will look for file changes on shared folders and refresh the list. This one goes out to CA Brive, thanks to Max for providing such good descriptions and pushing the software so hard. Composer Update - Added support for copying picture and movie recource clips from composer to composer. This allows you to easier re-use content across multiple composers. MarkUp Update - Using Control and click to right click on a button to rename it while in MarkUp mode will not push the button down causing it mark the timeline. Thanks to Ajax for catching this one. Synergy Sports Editor Import updated to support Synergy Max editor edits.
Atrributes now appear in the clip hover pop down menu for timelines and composers. This option is found under the Visuals menu in the main window toolbar: 'Show categories, qualifiers, attributes and row'. SORTA BUG FIX: Option dragging clips while scrolling vertical rows of timelines or composer topics now works as expected. The reason for the "bug" is that we added Option scrolling to move the playhead in the timeline or composer, this was conflicting with scrolling the body of the timeline or composed while a clip was being copied or moved. BUG FIXES:
|
||||||||||||||||||||||||||||||||||
| ANGLES Build 690 | ||||||||||||||||||||||||||||||||||
| August 11 2020 | ||||||||||||||||||||||||||||||||||
The 🌈 Sort & 📹 Mark Release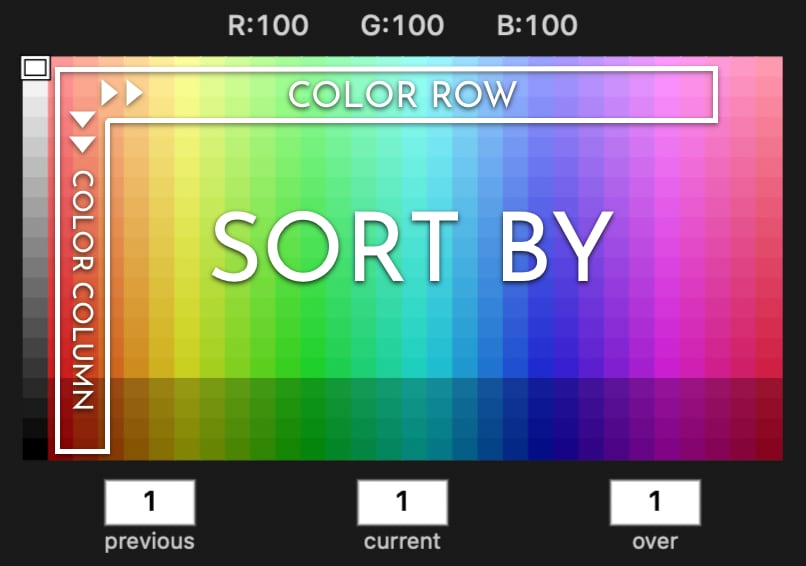
Color Row or Column Sorting options added to timeline sorting menu. We have re-structured the Timeline Sort menu and added new sorting options that will sort by the color palette grid row or column. To access the menu, right click on the timeline row header. 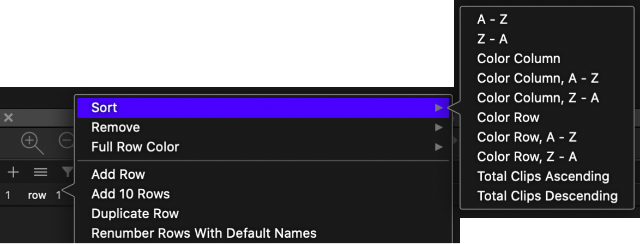
MarkUp Mode capture options added to MarkUp. While capturing, the new default behaviour is that clips being marked in the timeline will be inserted according to the live capture view. While in this mode, the playhead can be moved, clips be adjusted or sent to a composer, but all buttons that are pushed down in the markup will be inserted according to the live capture window. The alternate mode is the former default mode, clips will be inserted according to the playhead location. 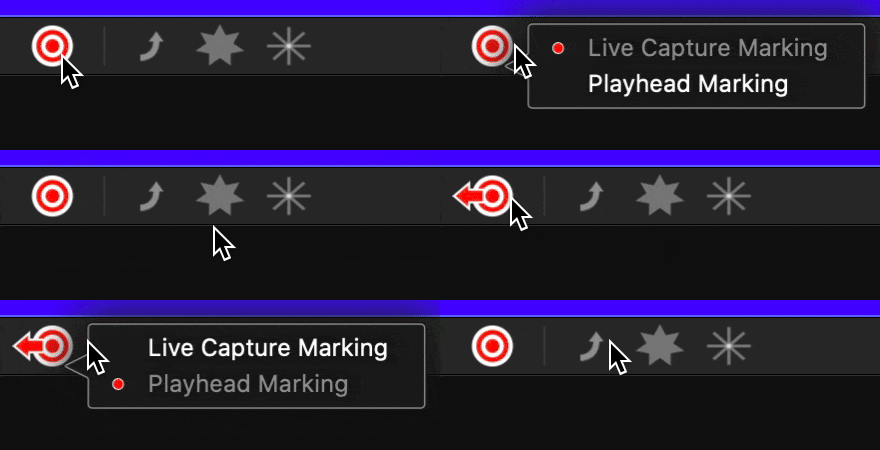
To access thes options, right click on the MarkUp button and choose your preference. MarkUp button hotkeys will only activate the most recently used MarkUp if two or more MarkUp views are open in a window and in MarkUp mode. We often forget how awesome Undo and Redo features can be. Thanks to New Mexico State for reminding us! We have a few data collection projects on the go at the moment and we figured enhancing Undo features would be very helpful there too. So, we added better undo and redo marking in the timeline in MarkUp mode. Command Z will walk back timeline marks made while in MarkUp mode. Shift Command Z will walk forward the marks if you use Undo. Essentially, it works just like editing a text document. MacOS Catalina recognizes the Hudl remote as a different type of keyboard than in previous operating systems. The remote must be configured as an ANSI type keyboard in the Keyboard Settings of System Preferences. So, connect the remote in the Bluetooth Settings and go to Keyboard Settings, then click the "Change Keyboard Type..." button. Follow the prompts and choose ANSI. Updating the name of the device in the Bluetooth Settings is recommended too. Quicker File Linking add by holding down Shift Control Option, then clicking and dragging from the body of the timeline or movie collection, you quickly link files together. The convenience of this feature will make a lot more sense when we release the matrix! Composer Picture Duration preference added to 'Clips - picture duration.plist' file located in /Users/Shared/Angles/Preferences. The default is 3 seconds. This effects the duration when split clip and insert picture clip is used.
              <key>default picture duration seconds</key>
	          <real>3</real>
Fade Unselected Clips added to the Visuals menu. When this option is turned on, clips that are not selected will be faded out, making the selected clips easier to see. If the default fade factor is too faded, a preference file 'Clips - fade color.plist' is located at /Users/Shared/Angles/Preferences. It can be edited to adjust the amount of fade applied.
              <key>fade factor</key>
	          <real>0.25</real>
Customize Angle Flicking Shortcuts in a new preference file. The default keyboard shortcuts: 1,2,3, etc. can be customized by editing a file called 'Keyboard Angle Shortcuts.plist'. This file is located in /Users/Shared/Angles/Preferences. By default the settings in this preference are turned off. At the top of this plist file is a key called 'TURN ON', it is set to false.
              <key>TURN ON</key>
	          <false/>
Change false to true. Then adjust the options for each angle as required.
Modifier keys can be turned on by setting the their respective values to true.
The keys are set using key codes, the reason for this is extra keys can be
configured like a number pad, these numbers have a different key code
even though they input the same thing. The Mac key codes can be found here: There is an interesting key option at the bottom of this preference file, 'use in markup mode only'. When this is set to true, the custom keyboard shortcuts are only used while in MarkUp mode. This allows you to keep the default setup when not in MarkUp mode. The preference file can be edited by TextEdit or other plain text editor. There is an app called PlistEdit Pro. It might be wise to download and use this editor. We are a bit surprised we made it this long without someone requesting this feature. We can thank Ajax for this request as they have been using 2,3,4,5 as shortcuts for marking clips for many years in that other software and as they were marking, angles kept flicking back and forth! We don't want to mess with great muscle memory. Holding down Option while scrolling a mouse wheel or using a two finger trackpad gesture in the body of the timeline will move the playhead left or right in the timeline. |
||||||||||||||||||||||||||||||||||
| ANGLES Build 673 | ||||||||||||||||||||||||||||||||||
| July 2 2020 | ||||||||||||||||||||||||||||||||||
Finishing Touches 👩🎨 ReleaseThis release marks the end of new feature work on the MarkUp for a little while. These few minor features open up some very powerful data collection potential. We are really excited about these features because they are concepts we have wanted to do for a very long time, but did not have the supporting feature set to do so until now. Last and Next Qualifier option added to Qualifier Attribute button. This option allows the same attribute to be assigned to two qualifiers, the last one and the next one; very helpful for connecting chains of events. For example, you can use the same cartesian X,Y data for two different qualifiers: Pass Received and Ball Dribble Start locations. Next Down Qualifiers will be inserted into active marking clips that are privately linked. For example, qualifiers can be inserted into the next player clip button that goes down and be inserted into privately linked possession clip buttons that are down, already marking the timeline. Category Change option added to None button's Change feature. This option enables more refinement for search and replaces and really helps with the renaming of cartesian qualifier attribute buttons. Control Option Arrows in a MarkUp will select a button that is closest in the direction of the arrow key pressed while Control Option keys are pressed down. If buttons are stacked, the selector will go down the stack. This feature is helpful when editing buttons with Down/Up > To Front/Back actions. The MarkUp must be in focus, in edit mode and a button selected in order for this to work. Dark qualifier button text in the inspector has been made lighter in order to enhance readability. Thanks Max at CA Brive for sharing this one and the bugs below! BUG FIXES:Clip creation animation while clip is being marked was failing if button had a negative Time Down. Clips removed using Escape while in MarkUp mode were leaving an invisible clip. This is now all cleaned up. |
||||||||||||||||||||||||||||||||||
| ANGLES Build 664 | ||||||||||||||||||||||||||||||||||
| June 25 2020 | ||||||||||||||||||||||||||||||||||
The New Norm 😷 ReleaseWe are excited to see sport again 🥳 even without crowds. 🙌🏼 everyone for providing feedback while climbing back into the match day saddle. It means a lot to us to hear the good news and that our work through the pandemic is proving to be on point and helpful. This release polishes off a bunch of minor and major features in the MarkUp area. The solid foundation that Angles has been built on makes doing these features a breeze. Keep the suggestions coming! MarkUp Updates:
Up Note & Down Note options added to clip buttons. When
these options are selected, a floating clip note editor will pop up when
the button is pushed up or down. Each editor is bound to the specific clip, the
row and clip number appear in the title bar.
All the shortcuts work as they do in the other note editing features. To close the editor hit the red button in the title bar or press Control Return on the keyboard after inputting a note. Pressing Command W will also close the note editor, just be careful using this shortcut because it will close your Angles window too! Alternate Button Names option added to None buttons. A none button with this option selected can store a list of names that can be selected to rename a button.
Here is how is works:
You can create as many lists as you want. Each list will appear in the right click menu at the bottom. This feature is great for substituting in and out players. The first person to request this was Mike Harkness at LSU Basketball in the States, it was nearly 3 years ago! Thanks for being patient Mike!
So, when you click on a Change button, it will search the markup for names that match its name, even a part of a name, then replace the found names with the closest Change button's name. Closest is measured by the center of the buttons. Here is what you need to know:
Undo support added for button name changes. This is pretty important to the Change feature as you can change a whole bunch of names that you did not intend to, so remember to press Command Z if you make a mistake using the Change feature. The implementation of the Change feature was inspired by a request from John Sheahan, a good friend of Fulcrum in Japan.
Block Qualifiers option added to clip type buttons. Selecting this option will block all qualifiers from being inserted into the clip. Hide Name option added to buttons. Selecting this option will visually hide the button name of the button.
Escape Key Shortcut, pressing the Escape key on the keyboard during MarkUp mode while clip buttons are down, actively marking the timeline will remove the clips and their presence in any qualifier insertion queues. Delayed Up option added to Clip Auto Up options. Selecting Delayed Up will delay the time that the auto up time will count down until the moment when the clip button is pushed up. Up > Down & Down > Down button actions extend the auto up time. Private action link support added to Last Down qualifer option. Timeline Updates:
To edit an existing row name, select the row with one click, then do a long click down on the name, the text editing will commence when the click goes up. Remove Qualifers from selected clips added to timeline and composer remove menus. General Updates:Filtered Out Clips are ignored when selecting all clips in the timeline and composer. So, now you can press Command A and select only the filtered in clips. In the timeline, the lasso tool only selects filter in clips. Filter input box expands to show full filter pattern. Thanks to Mikey at Sheffield Utd for pointing this one out. Remove menus in timeline and composer re-arranged and updated to show more details. When Angles window is minimized in the Dock, clicking on the Angles app icon in the Dock will open the windows back up. |
||||||||||||||||||||||||||||||||||
| ANGLES Build 643 | ||||||||||||||||||||||||||||||||||
| May 14 2020 | ||||||||||||||||||||||||||||||||||
The COVID-19 ReleaseWe hope everyone is going ok in the face of our current global situation. Our time has been focused on spending a lot more time with our families 🏄, developing our products 🏋️ and trying to maintain our sanity 🤦. We suspect you are doing the same 😀. It is a crazy world now and we wish you the best 🙏. This release has been bubbling along in pre-release for quite awhile now. There are a load of new features and performance enhancements. Please read through the notes and contact us if you have any questions. MarkUp Updates:
Last Up, Last Down, Next Up and Next Down features added to qualifier buttons. When selected, these features will insert the qualifier into the clip button that was last pushed up or last pushed down or the next pushed up. These features are useful for marking qualifiers automatically in clips using button actions. The coolest aspect of these features is that they scan for private links first, so if a private link exists, the qualifier will be inserted into the last clip up or down or next clip up or down that is privately linked to that clip button.
Center Fire feature added to the MarkUp shortcut key.
MarkUp button shortcut key indicator can be moved like the button name text by holding down Control Option then clicking on the text and dragging to desired position. Private actions updated to add more control where qualifiers are inserted. If a clip button has a private link, only qualifiers that are privately linked will be inserted. Qualifiers not linked to the clip button will not be inserted into clips created by the clip button. MarkUps open faster and are presented sharper. Composer Updates:Copy clips from Composer to Composer added to the right click clip menu in the composer. This works similar to copying from a timeline and includes specific topic choice. Also, clips can be copied to the same composer in a different topic.
Inline topic editing added to composer.
Remove Stars and Remove Notes for selected clips added to the right click clip menu in the Composer. Exclude all topics in the Composer by holding down Option and clicking on the exclude button in the topic header. This is similar to showing and hiding all contents in a folder. Composer clip linking added to the movie collection. There are times when you need to link a different movie collection to clips in a composer. This can be done by opening an alternate movie collection, then clicking and dragging from the link icon in the movie collection toolbar to clips in the composer. When dragging the link arrow over the clips in the composer, clips from a like collection will highlight in the composer. Once you let go, a message will appear explaining the new linking that will take place. Linked movie collection details appears in inspector for a selected clip. Clicking in the topic header selects all clips in the topic. Updated topic dragging routines and all clips are displayed when topic is dragged up or down. Clip selection made easier in the Composer. Multiple clips can be selected using Command, Command can be released, then Option held down and the clips can be moved. No more clicking on the last clip twice! Topic rows will scroll when dragging a clip to the top or bottom edge of the composer. Timeline Updates:Copy clips to Composer Topic added to the right click clip menu in the timeline. Remove Stars and Remove Notes for selected clips added to the right click clip menu in the Timeline. JSON Timeline Export has been optimized and more export triggers have been added: when a note is inputted in a clip and when a clip is manually created in the timeline using Shift Control drag. Timeline Description field added to inspector. Metadata such as weather, time, identifiers, etc. can be inserted here to describe the timeline. The data will be included in the native timeline files and JSON exports. Added option to include the clip notes in the name of cut clips from the timeline. This option can be found in the Cut Clip Settings of the timeline. When there are multiple note types, the notes will be concatenated into the file name. NOTE: file name length limit is 255; with the file extension, there are 250 characters that can be included, so notes might be truncated. Better timeline file saving. Live touchbar button, Live button in timeline toolbar and Command J shortcut push the timeline playhead as close as possible when HLS movies are in the movie collection. Improvements to HLS streaming loading and jumping to live edge of stream using Live button in touchbar and timeline toolbar and Command J shortcut. Movie Collection Updates:Localize All HLS Movies option added to right click menu on movie collection. This begins localizing procedure for all angles in the movie collection. More improvements to the HLS movie creation and localizing routines. The right click menu has been re-arranged and includes an option to use local movies for all angles or use HLS movies for all angles. Better copy and paste of HLS from Piston into Angles. All angles can be copied to the clipboard at once from Piston and pasted into Angles in one go. Angle IDs are automatically created when HLS URLs are pasted into a movie collection. Added movie ratio option Fit To Widest under the movie collection Arrange menu. This option helps support panoramic camera views. General Updates:A lot of refinements when loading, closing and saving files. Popup menus have been re-written with new intuitive behaviours included; much easier to navigate without losing the path to the selection. Optimised closing of Super Tabs. The routines involved in saving and closing of all the files in the Super Tab have been made more efficient. The application clip menu shows all possible copy options with shortcuts. BUG FIXES:Join Timelines was creating a new collection and timeline, however it was not copying the data across to the new files. This works properly now. Locked Play was allowing space bar and arrow keys to control the playhead while in MarkUp mode. These keyboard shortcuts are now disabled in locked play mode. When a timeline is open while Angles is launched, the timeline was not being drawn correctly. This has been fixed. Popup menus not properly responding to trackpad gestures. |
||||||||||||||||||||||||||||||||||
| ANGLES Build 596 | ||||||||||||||||||||||||||||||||||
| January 20 2020 | ||||||||||||||||||||||||||||||||||
|
Our first release in 2020! New Markup features for those pedantic markup artists and some new beta features for hardcore users. Align added as option in the right click menu of a button in the MarkUp. Select multiple buttons using Command, then choose one of these options to align them. The options are:
Button alignment and sizing features use the button where the menu item was clicked as the reference to align the other selected buttons. In the align menu are options to Equalize Height and Equalize Width. These options will alter the button dimensions based on the clicked on button. Great for creating perfectly sized buttons. And option to Space Evenly Horizontally and Space Evenly Vertically, this feature requires 3 or more buttons to be selected and will set the space evenly between the selected buttons. Try aligning a group of buttons using the left align feature, then space them evenly horizontally, makes a nice tidy stack! Position Button Name by holding down Control and Option keys then clicking and dragging on text for the button name. Be sure the button is not selected first, it does not work when the button is selected. Pinger Effect added as a button visual effect when a button is pushed down. The tick box to set this is in the button type row of the inspector. Use the pinger effect in conjuction with None button types to create backgrounds for groups of buttons that draw attention. Playback Speed Steps added as a preference and its defaults have been updated. Now, when the up arrow is pressed in rapid succession, the movie playback speed will step through the following values: 1.3333x, 1.5x, 1.6666x, 2x, 3x, 4x, 5x, 8x, 16x, 32x, 64x. And when option is held down and the up arrow is pressed in rapid succession the playback speed will drop through the following values: 0.5x, 0.25x, 0.1x. Great suggestion from Sheffield United! Locked Play and Unlocked Play added to the right click menu of the play button in the timeline toolbar. If you set the 'Locked Play' option:
This feature can be used if video feeds are not present while marking a live event. Timer Clip added as a new BETA markup button type. This button type creates an alternate timer that can be used to provide a secondary time for clips. For example, this type of button could be use to provide the official time of a football match; covering both halves. If a timer clip exists, a clip will automatically grab the timer clip time from the closest timer clip to the playhead, adding it to the clip in the timeline data. Currently, you will not see this unless you look at the raw timeline data in the timeline PLIST or JSON files. The time is stored as 'alt seconds' according to the options set for the timer clip. The timer clip button type has an option called Timer Offset that can be set in the inspector, this value is minutes. This is helpful when working with multiple segments of time like a first and second half of a football match. You can set two separate timer clips with the same name and different offsets. The first timer offset starting at 0 and the second timer offset starting at 45. In some sports, the game clock counts down from a specific time and can be stopped by the officials. So, there are two options to support this: Cumulative and Count Down. When cumulative is selected, gaps between when the timer clips starts and stops will be subtracted. When Count Down is selected, time will count down from the offset time. For example, in NBA basketball, you might have 4 quarter timer buttons where each is configured with an timer offset of 12, cumulative option selected and count down option selected. If you mark each time the game clock starts and stops, you will be able to calculate all clips and qualifiers timing according to the game time. To calculate the match time for the start of a clip, add the ‘alt seconds’ value to the start time of the clip. If the timer clip or row used is a count down timer, then subtract the start of the clip seconds from the ‘alt seconds’ value. The same calculations can be done to determine match time for the qualifiers. Optimized JSON timeline export and added a feature that generates a uniquely named JSON file for each time the export is fired off by changes in the timeline. A folder called JSON ARCHIVES is created in the target export folder, then the uniquely named copies of the JSON export will be created here. Each file has a time stamp in the name that can be used for sorting and grabbing the latest data. The purpose of these individual files is to insure that file operations such as upload are not effected when Angles exports the latest JSON data. NOTE: JSON Archives that are older than 10 minutes ago are automatically deleted except the last 3. Qualifier Attributes are exported in a label tag of the legacy XML export for the timeline. Quieted down the "There was a problem connecting to the server ..." message when Angles is seeking for files where the network shared folder location is not accessible. If you use shared folders on file servers or across networks to other Macs during live capture, you would have noticed some considerably long hangs where Angles would become unresposive on launch. This is due to the macOS underlying file mechanisms trying to connect you back to your data. We have reduced the default search time for Angles folders upon launch to 2 seconds per folder. This is per folder, so if you have a lot of mounted shared folders, each one will search for 2 seconds. This value can adjusted in the 'Volume Mount Hang Time.plist' preference in '/Users/Shared/Angles/Preferences' folder. If the shared folder is reachable, it will automagically mount in the system and appear in Angles. If it is not reachable, the Angles folder in the files list will have a red background. If the shared folder is mounted while Angles is running, you can double click on the folder to mount it inside of Angles. If the Angles folder was the focus folder, located in the shared network folder and not reachable, the focus folder will become your home folder. When the shared network folder is mountable, Angles will automagically set the focus folder back to the shared network folder where the Angles folder is located. There may be areas that we have not covered with these routines, please let us know if you are experiencing long hangs across network shared folders. There is likely a lot more refinement we can do in this area to make the experience better. Opening capturing movie collections fix for Catalina. We found that Catalina's SMB default services preferences use file caching options that are not helpful during live capture. We, now, update specific file flags to allow services see active movie capture collections better across shared network folders. Inline File Name Editing!!! Finally, we added the ability to edit file, folder and window names in the files list sidebar. This feature works similar to Finder: Select the file, folder or window and then click again on it to initiate the editor. Add UTF-8 and UTF-16 options for the Clip CSV Table export in the timeline and composer. BUG FIX: Cartesian values were not being attributed to qualifiers when a Down > Up action was used to end a clip. Also, multiple of the same qualifier can be added to a new clip when marking clips in the timeline while Mark mode is activated. Adding multiple of the same qualifier when an existing clip is selected still requires holding down the Command key. Cardiff Met Students, we thank you for flagging this issue with us. BUG FIX: When editing notes in a super tab, then switching to a new super tab, the cursor would remain in the note editor causing all keystrokes to be entered into the note. This would stop any kwyboard shortcuts from working because they were being inputted into the note editor in the other super tab. |
||||||||||||||||||||||||||||||||||
| ANGLES Build 560 | ||||||||||||||||||||||||||||||||||
| November 3 2019 | ||||||||||||||||||||||||||||||||||
|
Export Clips CSV Table feature added to the timeline and composer export menu. This export includes options to choose what is included in the export:
It is a simple export, but very powerful for building reports in Excel, Numbers or online data visualisation platforms like Power BI or Tableau. When qualifiers do not have a category, the column header will be 'No Category'. It is always a good idea to include a category for qualifiers in the your markups. TIP: Use qualifier filtering to generate tables containing specific data. Or pump a season's worth of clips into a composer to generate tables of data across many many timelines. New clip merging preferences added to the timeline menu:
Keep overlaps will not merge overlapping clips together, this is often helpful when using the clips for statistical purposes, keeping each discrete clip in tact. This feature is very useful for creating clip data to be used in inter-rater reliability data collection. Remove overlaps is the default behaviour for handling the merging of clips. This option will merge overlapping clips into one, often better for playing clips and using them in composers. Copy Selected Clips To Row added to the right click row menu in the timeline. This feature copies the selected clips to the row using the overlap preferences for the timeline. Enhanced Legacy XML import with the following:
|
||||||||||||||||||||||||||||||||||
| ANGLES Build 552 | ||||||||||||||||||||||||||||||||||
| October 25 2019 | ||||||||||||||||||||||||||||||||||
|
CRITICAL FIX: Clip archiving would fail when movie characteristics changed. Clip notes are included in the Legacy XML export. All note types are put together as one note, each note separated by a space. If multiple buttons are selected by using rectangular lasso or Command click, right clicking on the group will not lose the group selection. This helps when applying different properties to the buttons like layers and locking. Enhanced the ability to annotate clips in the timeline. A cool workflow in the timeline is selecting rows of clips and jumping through them by pressing Tab and Shift Tab. There are times that you want to add a note to a clip, however when you do this, you lose the selected rows of clips. We have resolved this by remembering the selected clips when you press Control Return and then selecting them again when press Escape to close the clip note editor. Thanks to UNC Asheville for this workflow recommendation. Updated the qualifier attribute descriptions in the inspector. The attributes are a beta feature that we are going to start to refine in the near future, so we felt updating the feature language makes sense. |
||||||||||||||||||||||||||||||||||
| ANGLES Build 548 | ||||||||||||||||||||||||||||||||||
| October 20 2019 | ||||||||||||||||||||||||||||||||||
|
CRITICAL FIX: This build allows Angles to use non-notarized software libraries like Black Magic Design software libraries. If you use Black Magic Design devices for capture be sure to grab this immediately. New rectangular lasso tool for selecting buttons in the MarkUp. Click and drag from an empty area of the MarkUp canvas over a group of buttons to select them. |
||||||||||||||||||||||||||||||||||
| ANGLES Build 540 | ||||||||||||||||||||||||||||||||||
| October 15 2019 | ||||||||||||||||||||||||||||||||||
|
After a few minor wrinkles were ironed out and tested, we are happy to push out our official MacOS 10.15 Catalina release. This build includes loads of optimisations and background work to provide a better foundation for new feature space. Single Angle Export With Notes is likely the biggest new feature in this release for the composer and timeline. This export renders the clip notes and/or composer topics into a new movie. It is what we call a "what you see is what you get" feature, this means that whatever display options are turned on in the clip will be included in the exported movie. So, if you have one clip with a specific note type viewable and the next clip with a different note type viewable, the exported movie will reflect these perfectly. This export comes with a new settings panel that can be accessed in the export menu in the composer and timeline toolbars. The options are saved as a preference, the options are:
MarkUp Shortcuts can be displayed on a button by ticking the show checkbox next to the shortcut. Merge Clip option added to clip button type. When this option is selected, clips that have negative Time Down time that overlaps a previous clip, the clip will be merged with the previous overlapping clip. This feature goes out to our friends at QPR. I think we got two features Bartek requested in this build! When merging native Angles timelines, identical qualifiers and notes will no longer be duplicated. Thanks to Max at CA Brive for pointing this out! Hold down Command key to accelerate the angle offset adjustments in the movie collection. Thanks to Ackers at Insight Analysis for suggesting this one. Compact Rows and Show Table options added to the Export Qualifier CSV Table save panel. Hide Or Show Rows in the timeline is a global switch and is persistent. Be aware when this is set, no rows may appear depending on the filter. Angles folder locations are tracked as they are moved in the file system. However, do not move the folders while Angles is running! This can result in corrupted data. When the camera or microphone macOS security preferences do not allow access, the capture collection indicates the problem with a banned graphic over a camera. This can be clicked on to take you to the security preferences. We call this our "Mikey Said NO" feature, appreciate Sheffield United for their patience while we tried to solve why the hell the capture would not show the signal. When notes are pasted in the clip from apps like Pages or Word, the font color will be pasted to best match background. For example, if the note background color is black, the text will be white even though the font color was black when it was copied. This was added to help our friends at Leeds United. Thanks for the suggestion Willy! Quick Zoom keyboard shortcut added to quickly zoom in and out the timeline or composer. Pressing Control Z will toggle between two zoom views, zoomed in and out. To set the Zoomed In view, zoom the timeline or composer in to a point that show the clips in closer detail, then right click on the Zoom In button in the toolbar and select "Remember Zoom". Set the Zoomed Out view to show more clips, then right click on the Zoom Out button in the toolbar and select "Remember Zoom". Pressing Control Z will now toggle between the two settings for all timelines and composers. Stats Perform XML import merges overlapping clips by default. To override this and allow clips to overlap, drop the XML file onto the timeline while holding down Option. A new feature called Oscillate Clip Colors was added that alternates clip colors for overlappling clips, this helps in identifying where clips overlap. There are occassions where not merging is desirable, especially when using the matrix exports. BUG FIX: When a new movie + timeline was created and both files were named, the movie collection would be cleaned up automatically if no movie was dropped into it. This was problematic when creating archives. The empty named collection is now saved. New archive icon in timeline toolbar. Added new routines for merging clips to support clip notes. |
||||||||||||||||||||||||||||||||||
| ANGLES Build 510 | ||||||||||||||||||||||||||||||||||
| August 1 2019 | ||||||||||||||||||||||||||||||||||
|
Archive Timeline feature added to the timeline toolbar. Dragging from this timeline toolbar icon to a timeline in the files list or onto another timeline body will append selected clips to end of the targeted timeline. Archives are a great way of building up set of clips in one timeline. This feature is also handy for trimming down unwanted video or combining two or more portions of video into one. To use: Create an empty timeline and movie collection using the icon in the main window toolbar, name the new collection and link the timeline. The timeline will be linked automatically, but linking it again will rename the timeline using the name of the movie collection. With the new archive timeline ready to go, select some clips in a source timeline and drag from the Archive icon in the source timeline to this newly created timeline in the files list. Continue to archive clips from other timelines to build the archive. Clips can be archived to the start of an archive timeline by holding down Command when dragging from the Archive icon in the soruce timeline toolbar. This is a great wrinkle to the feature that allows you to order clips by most recent at the start of the archive timeline. The archiving process is queued and background threaded, so you can continue to archive clips even while other clips are being processed. Replace Angles Offsets With Blank Movies added to the movie collection arrangement menu. This feature generates padding movies when offsetting movies creates gaps in synchronized angles in the collection. Duplicate Timeline and Collection feature added to the timeline export menu. Hold down Option to create the duplicated timeline and collection in a new window. This feature was added to help when Optimizing Space for a timeline. Jump playhead feature has been added to jump the playhead a preferred amount of seconds. By default, when '/' and ']' are tapped, the playhead will jump 3 seconds. The preference can be found in the 'Keyboard Controls.plist' file, there is a setting called 'arrow key quick tap movie jump seconds', when its integer value is greater than zero, a quick tap will jump the playhead N seconds by the value set in the preference. There are also preferences for the keys that will jump forward and backward: 'jump backward key number' and 'jump forward key number'. Using Apple's key codes, you can customise these keys. Below is link that has all the key codes. The preferences plist files are located in 'Macintosh HD/Users/Shared/Angles/Preferences'.Close Front Super Tab short cut added using Shift Command W. |
||||||||||||||||||||||||||||||||||
| ANGLES Build 497 | ||||||||||||||||||||||||||||||||||
| June 08 2019 | ||||||||||||||||||||||||||||||||||
|
Join Timelines feature. Select timelines in the files list, right click on a selected timeline and choose Join Timelines. A new Super Tab is created with the joined timeline and movie collection. When Command is used to select timelines, the order of the join will be in the order of the selection. When Shift is used, the timelines will be combined from the top down. If start time offsets have been set for the angles in the movie collection or there are missing angles in movie collections being joined, a movie will be created to fill the missing sections. An image will be used to generate the missing angle movies. The image can be customised by swapping the image 'empty angle image.png' in the Preferences folder located at '/Users/Shared/Angles/Preferences/Empty Angle Image'. Optimize Space feature added to the timeline. This operation will compact the timeline and movie collection: removing parts of the movie where there are no clips in the timeline covering parts of the movie. Optimize Space is located in the Export menu of the timeline toolbar. This is an "inplace operation" which means it will update the timeline and movie collection without creating a new one. Due to the nature of altering a potentially large movie, it is not undoable and disk space must be considered. Angle numbers added to movie angles of the movie collection. As movie angles are added to the collection, a number is assigned to it. This number is the ID and the shortcut for flicking to the angle. The number appears in the bottom right corner of the movie angle. This number can be changed by right clicking on the movie angle and choosing Angle Number, then the number from the menu. The angle number can be hidden or shown by clicking on the number 1 icon in the collection toolbar. Filter Patterns are accessible under the Filter menu in the timeline toolbar and in the timeline row name column header. Filtered Out Row Hiding switch added to the timeline row name column header. This switch will hide all rows where there are no filtered in clips. Auto link naming, when a timeline is linked to a collection, the timeline is renamed with the same name as the collection if the timeline is the default timeline name and the collection is not the default collection name. If the Option key is held down, the timeline is unconditionally renamed with the collection name. This one goes out to Barça, thanks for suggesting this one Raúl! Capture Super Tab added to the main window toolbar. Capture tabs have been removed from the empty tab menu options. Capture tabs are now red. Show Clip Counts added as an option for the Matrix export. This provides a total count for all filtered in clips for each the row. Cut Clips To VLC preference added to timeline and composer. This preference is to set the address for the device running the VLC mobile app. The Control R shortcut to create a new row in the timeline will set the clip cursor in the newly created row. Added easier way to set focus folder: hold down Option and double click on the folder title. Hold down Option and click on any folder disclosure triangle to open or close all folders. Added sharper accent to focus folder by adding white border around disclosure trianlge. Legacy XML timeline import sorts by A to Z, then by color. Composer playback updated to skip filtered out clips. Changed shortcut for slow play, Option Up Up will step play speed down to half, quarter, etc. BUG FIXES:
|
||||||||||||||||||||||||||||||||||
| ANGLES Build 465 | ||||||||||||||||||||||||||||||||||
| April 14 2019 | ||||||||||||||||||||||||||||||||||
|
Qualifier CSV Table Export initial implementation available for timeline and composer. This export exports qualifier data row by row for selected clips, filtered in clips and all clips when none are selected. It is extremely powerful to help drive data into Excel, Numbers or other business intelligence tools like Tableau, Watson, etc. The export includes qualifier time, cartesian coordinates and qualifier attributes with their similar data elements. More work coming soon for this export. Double tap 0 to average all angles in a collection added as a shortcut. BUG FIXES:
|
||||||||||||||||||||||||||||||||||
| ANGLES Build 459 | ||||||||||||||||||||||||||||||||||
| April 9 2019 | ||||||||||||||||||||||||||||||||||
|
BUG FIX: Undo manager clearing all clips notes when editing in the timeline or composer. |
||||||||||||||||||||||||||||||||||
| ANGLES Build 457 | ||||||||||||||||||||||||||||||||||
| April 3 2019 | ||||||||||||||||||||||||||||||||||
|
CRITICAL BUG FIX: Memory leak found and fixed in the inspector that caused the application to perform sluggishly and eventually lock up. We are in the middle of several very cool features that are not 100% complete, but this fix was so important that we wanted to get it out. The upside is that we decided to leave the new features accessible, so you can have a look at them and feedback to us if you wish. Cut Clips To VLC feature work in progress. This feature works similar to the Cut Clips feature and is an option in the Export menu of the timeline and composer.To use:
This feature has been tested a lot in the past month, but is currently limited to exporting to one device. Work to add more devices and a proper preference for adding the devices will come soon.
While checking for areas of optimisation in the MarkUp code as a result of the bug mentioned at the top of these notes, we enhanced the None button and optimised a few things:
None buttons are useful when you want to group buttons together graphically using a background. None buttons do not mark anything in the timeline, but they are still technically a button. So another way of using None buttons is to have them hold state (Up / Down) whereby other buttons can read the state and do something. The Down/Up < All Up/All Down button actions can read the state of other button(s) from which you can trigger some pretty interesting things in terms of marking in the timeline and using the Centering actions to cruise around your MarkUp view. JSON export added to the list of timeline exports. This export saves out all timeline data except notes in a JSON format. An option to resave the file as the timeline is updated is available for live exporting during capture and markup mode. JSON is a very common data file structure and many languages have built-in parser support. So, we like to use this format for building web reports. For example, it is relatively easy to use the D3 JavaScript library to build beautiful reports using your timeline data exported via JSON. Active Timeline Merging feature has been partially implemented. This feature will merge one or more linked timeline(s) into a destination timeline while allowing you to continue to work on the destination timeline. This feature is pretty simple to use and working very well even at this early stage of development. It can be used at any time to simply merge timelines, but is most powerful during live capture. To use: We will reference the timeline where clips will be merged into as the destination timeline and the timeline(s) to be imported as the source timeline(s).
Clips and their qualifiers will be merged into the destination timeline. This link lasts until Angles is quit. Future updates will include:
Qualifier Attributes have been mostly implemented. A qualifier attribute adds further description to a qualifier, similiar to the way a qualifier adds further description to a clip. For example, you may have a qualifier called Pass and qualifier attributes such as: xy location, passer name and pass recipient name that can be attributed to the qualifier within the clip. Depending on the data entry sequence, a qualifier attribute can be configured to be pushed down before or after a qualifier using the attibute's stage setting. When the stage is set to before, the attribute will be stored until a qualifier is pushed down, then it will be added to the qualifier. When the stage is set to after, the attribute will be added to the last qualifier pushed down. This set of features create a powerful way of marking relational data points and setting up simple ways of structuring and exporting data. A CSV export will be added where each qualifier and its attributes are exported as a row with the clip data including notes. Current limitations:
Cartesian Coordinate Button has been partially implemented for qualifiers and qualifier attributes. When a qualifier has the Cartesian option selected in the inspector, coordinate values are recorded in the timeline plist and json file. Currently, the cartesian xy values are represented with values ranging from 0 to 1. (0,0) is the top left corner of the button and (1,1) is the bottom right corner of the button. While the option is available for qualifiers and qualifier attributes. In most scenarios, the cartesian option will be used with qualifier attributes, but there are good reasons to have the qualifier itself be a cartesian type. For example, you may want to simply track location for a player during a passage of play; we might create a cartesian qualifier called "Bob", then click this button to record where Bob traveled on the field of play during the clip. This feature will be updated to allow configuration for the grid of values, max and min values, origin location, etc. This will make working with the data a lot more human friendly. Single Angle Composer export is super fast again. The checks for movies have been optimised. Notes Options added to display menu for individual notes in the inspector:
|
||||||||||||||||||||||||||||||||||
| ANGLES Build 438 | ||||||||||||||||||||||||||||||||||
| March 6 2019 | ||||||||||||||||||||||||||||||||||
|
It has been too long since our last release, but it is for good reason! This build introduces our initial clip notes feature implementation. We believe it is some of our best work to date. During the journey of developing this feature, we have refined the application in many many ways, most of all adding a lot of keyboard shortcuts that compliment Control J K L for piloting around the timeline without lifting your palms off the keyboard. You will also see that we have added some new icons and have dropped the name vault and changed our wording to folder. Along with this name change, the default Home Folder is now is located in your Movies folder. Please note that as of build 434, Angles will move "Home Vault" from your Documents to your Movies folder and rename it "Home Folder". The main reason for moving the default folder is that iCloud Drive can be set to backup your Desktop and Documents folders. When iCloud Drive is enable with the options for Desktop and Documents selected, we had a lot of users filling up their online storage with Angles movie data while using up a lot of bandwidth. Clip Cursor is a small white dot that runs up and down the playhead cursor in the timeline, we call this the clip cursor. The clip cursor identifies the timeline row in which you are working. This is important to understand because many of the new keyboard shortcuts relate to this dot. The new shortcuts:
Clip Notes can be added to a clip in a timeline or composer using the Control N shortcut or by long clicking on a clip or in the Inspector. The text will appear in a note block overlay on top of the movie. The note block can be scaled by hovering over the block in the movie, then mouse scrolling up or down. The background opacity can be adjusted by holding down Command, hovering over the the block, then mouse scrolling up or down.
The text can be edited in 3 places: the clip popup, the Inspector and directly in the note overlay block in the movie. Font type, size and styling and various other text features can be applied to the note text using the native macOS Fonts palette and related text editing shortcuts. The Fonts palette can be accessed in the Format menu or by pressing Command T. Emojis are supported as well, open the Character Viewer from the Formats menu item called Emojis or use the Control Command Space Bar shortcut. Custom note types can be created and their background color can be set. To add a note type choose Add A New Note Type from the Notes menu in the Inspector. Notes can be set to display or not in the movie by selecting Collection or Off in Display setting option for the note in the Inspector. More polish around angle flicking behaviours when working with locked angle positions for clips in the timeline and composer. In previous versions, clip insertion using Shift Control Click Drag in a timeline, would start the clip from the last point in which the playhead was stopped. This was annoying even though it could make the clip insertion more accurate. Now, Shift Control Click Drag inserts the clip right where the drag starts. Bug Fixes:
|
||||||||||||||||||||||||||||||||||
| ANGLES Build 392 | ||||||||||||||||||||||||||||||||||
| November 29 2018 | ||||||||||||||||||||||||||||||||||
|
You will notice a significant performance increase in this build. It turns out our Undo Manager was too greedy and tracking too many objects which resulted in sluggish performance at times. So, we reduced the amount of undo steps in order to improve performance. Each file type has different steps of undo:
If you think you require more, please let us know. We chose these based on our software usage across many applications which may not suit everyone's use cases. Sort Topic By Timeline Clip Start Time added to composer for our friends at Leeds United. This option sorts all the clips according to the clip's start time in the origin timeline. An option for sorting all topics at once in this way is available too. To access, right click anywhere in the topic, navigate to Sort and choose the sort option. Sort Topic By Movie Then By Timeline Clip Start Time added to composer. This option sorts all clips by the movie and then sorts the clips by their start time. An option for sorting all topics at once in this way is available too. When sorting a single topic by movie then clip start time, the movie sort order is determined by the order that the movie first appears in the topic. When sorting all topics by movie then clip start time, the movie order for all topics is determined by the order that movies first appear in the topic clicked to show the menu. Color all clips from the same movie in the composer. This is very helpful to distinguish between clips from different movies. To use:
Flash clips in the composer added in the Color menu. Right click on a clip, navigate to Color and choose 'Flash Clips From Movie'. Row duration for selected clips added to the the inspector. Click on the row name in the timeline to show in inspector. Bug fixes:
|
||||||||||||||||||||||||||||||||||
| ANGLES Build 384 | ||||||||||||||||||||||||||||||||||
| November 24 2018 | ||||||||||||||||||||||||||||||||||
|
We view this update as a critical as we have solved issues in our movie loading and capture completion procedures. We owe a real debt of gratitude to Mike Harkness at LSU Womens Basketball for trialling HEVC (H.265) capture and giving us real time feedback as a game was being played. Mike found an interesting problem where the timeline movie collection was not including parts of the capturing file which caused clips to be inserted incorrectly during markup. His williness and patience to work with us during the game lead us directly to the problem and we were able to solve it, then improve these important procedures. Mike has been incredibly helpful for the past 2 seasons and certainly helped us in building a robust and stable product, Thanks! Obviously, issues during critical moments like a game are not what we want to happen, but when it does happen, it is great when we can get real time information and ask questions. Often, replicating a bug or state of the software in a particular situation is very tricky, especially as our software becomes smarter and more mature. Composer duration added to composer inspector. The duration includes picture and movie clips that are dragged and dropped into the composer. Topic duration added to composer topics next to the topic title. Each topic displays the total duration of all filterd in clips. If clips are selected in the topic, the time will show total duration for those selected clips. Shout out to Wake Forest Womens Basketball for this request. Topic exclusions added to composer topics. Clicking on the small circle above the topic number will exclude the topic from being played or exported. J K L I O shortcuts added to speed up clip marking and trimming. This feature goes out to Leeds United. They, recently, requested the I O keyboard methods to hasten their workflow, so we added some more on top of their request. We love shortcuts too, they are hard to remember at first, but once the muscle memory kicks in, they will save you heaps of time. Using Control J K L I O shortcuts to move through the movie and trim clips keeps your fingers in the home positions on the keyboard; increasing your efficiency during these repetitive tasks. The J K L I O shortcuts have been cleverly bound to the Arrow key shortcuts. So, learning them is easy.
★ Star rating added to timeline clips. Press the plus or minus key on the keyboard to add or remove stars to timeline clips. Touch bar keys have been added too.
★ Star rating filtering. Clips can be filtered in timelines and composers by clicking
on the star button next to the filter title in the inspector. Clip filter patterns can be saved, so they can be easily applied to other timelines and composers. To use:
Filter patterns are saved with the timeline and composer data, so they are shared when distributing these files through native exporting or including in vaults. Improved filtering, anything that is in inside quotes must match a qualifier or qualifier category exactly. Updated manual clip creation using Shift Control. When Shift is pressed, the timeline playhead position is remembered and will be used as the new clip start time. This increases the accuracy of the start time. Batch qualify selected clips in the timeline with the same qualifier in one go. Example usage:
Touch bar shortcuts to show and hide Vault and Inspector sidebars. Synergy import includes Team column data from their export.csv file. This is imported as a qualifier with Team as the qualifier category. Added support for a bluetooth keyboard remote. Bug fixes:
|
||||||||||||||||||||||||||||||||||
| ANGLES Build 371 | ||||||||||||||||||||||||||||||||||
| November 7 2018 | ||||||||||||||||||||||||||||||||||
|
Shortcuts added to quickly edit clip start and end times:
A new feature to remove all qualifiers from selected clips has been added to the timeline and composer. Example usage:
Fixed issue where Control Tab was not pushing down the last buttons that were pushed up using MarkUp Tab shortcut after pausing and resuming capture. Fixed issue with jump to live shortcut. |
||||||||||||||||||||||||||||||||||
| ANGLES Build 368 | ||||||||||||||||||||||||||||||||||
| November 6 2018 | ||||||||||||||||||||||||||||||||||
|
Shortcuts added to quickly edit clip start and end times:
Pressing Option while dragging a clip to another row will merge overlapping clips. Previously, the clip would split overlapping clips. A new copy option has been added to the timeline that copies selected clips from one row to another. This is really handy when you need to copy/merge clips from one row to many rows. Example usage:
Added up and down arrow key playback controls to composer. |
||||||||||||||||||||||||||||||||||
| ANGLES Build 367 | ||||||||||||||||||||||||||||||||||
| November 2 2018 | ||||||||||||||||||||||||||||||||||
|
Shortcut added to jump playhead to live capture edge (red) during capture:
When capture is stopped, all MarkUp buttons down will be pushed up. |
||||||||||||||||||||||||||||||||||
| ANGLES Build 366 | ||||||||||||||||||||||||||||||||||
| November 1 2018 | ||||||||||||||||||||||||||||||||||
|
Jump To Live button added to touch bar during capturing. Pressing this button will jump the playhead to the live edge of capture. Shortcuts added to adjust start and end time for selected clips by 1 second per press.
|
||||||||||||||||||||||||||||||||||
| ANGLES Build 365 | ||||||||||||||||||||||||||||||||||
| October 30 2018 | ||||||||||||||||||||||||||||||||||
|
Added new menu option to copy selected clips to new numbered topics. Each clip
is copied individually to a topic, great for zooming or treating the clip and
then exporting individual movies by topic. |
||||||||||||||||||||||||||||||||||
| ANGLES Build 364 | ||||||||||||||||||||||||||||||||||
| October 29 2018 | ||||||||||||||||||||||||||||||||||
|
Added new menu options to copy clips to composer. When right clicking on a clip the popup menu will show all open composers that can be copied to. |
||||||||||||||||||||||||||||||||||
| ANGLES Build 363 | ||||||||||||||||||||||||||||||||||
| October 27 2018 | ||||||||||||||||||||||||||||||||||
|
New split clip shortcuts in timeline and composer.
'Set Zoom To Current View' added to timeline and composer clips right click menu.
Changed MarkUp mode shortcut ⇧⇤ (Shift Tab) to ⌃⇤ (Control Tab).
Updates to timeline saving and post capture updating routines. Improved MarkUp mode when multiple timelines are open. |
||||||||||||||||||||||||||||||||||
|
If you are having trouble and need help or just have a question, please email us at Support. |

 Down > Button Color
 Up > Button Color
 Down > Mark Color
 Up > Mark Color
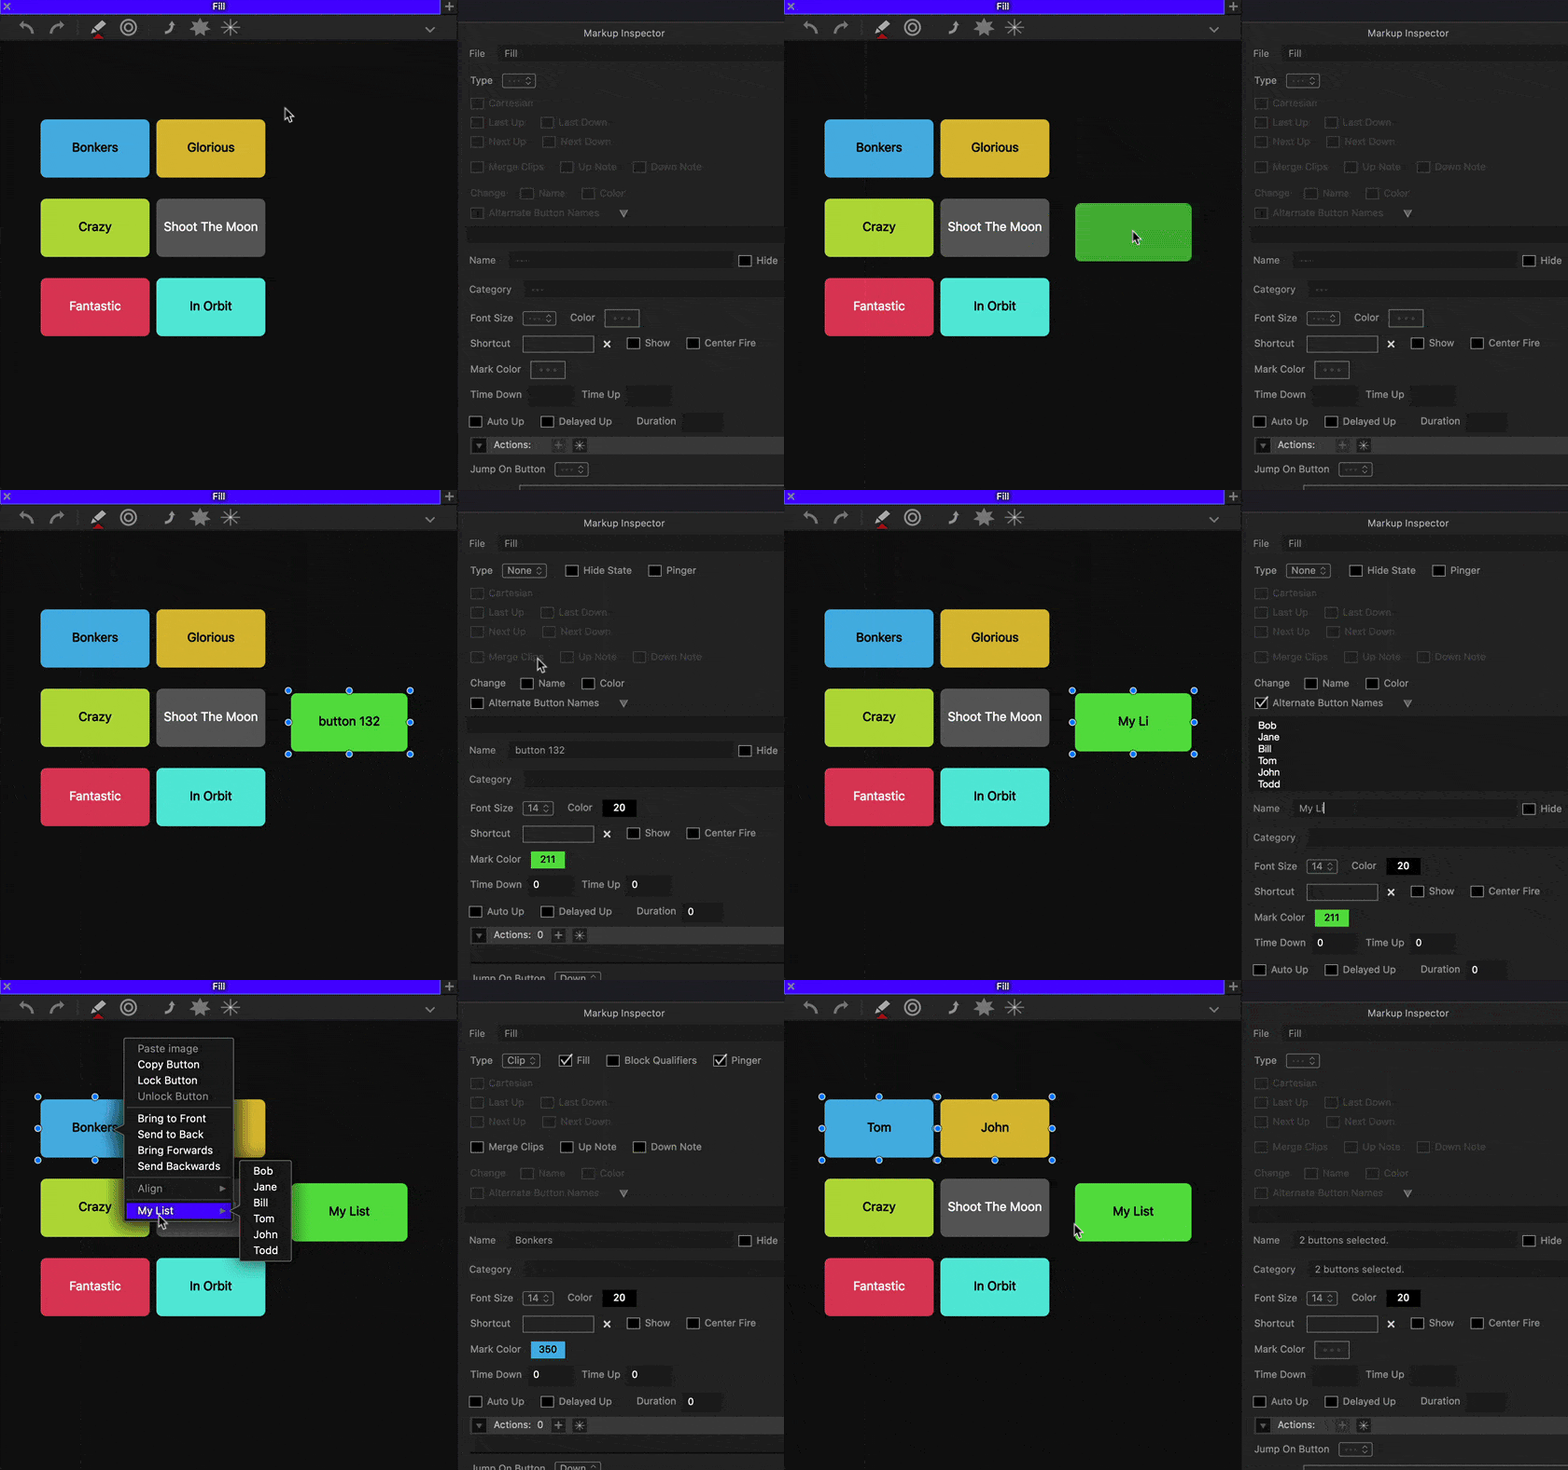
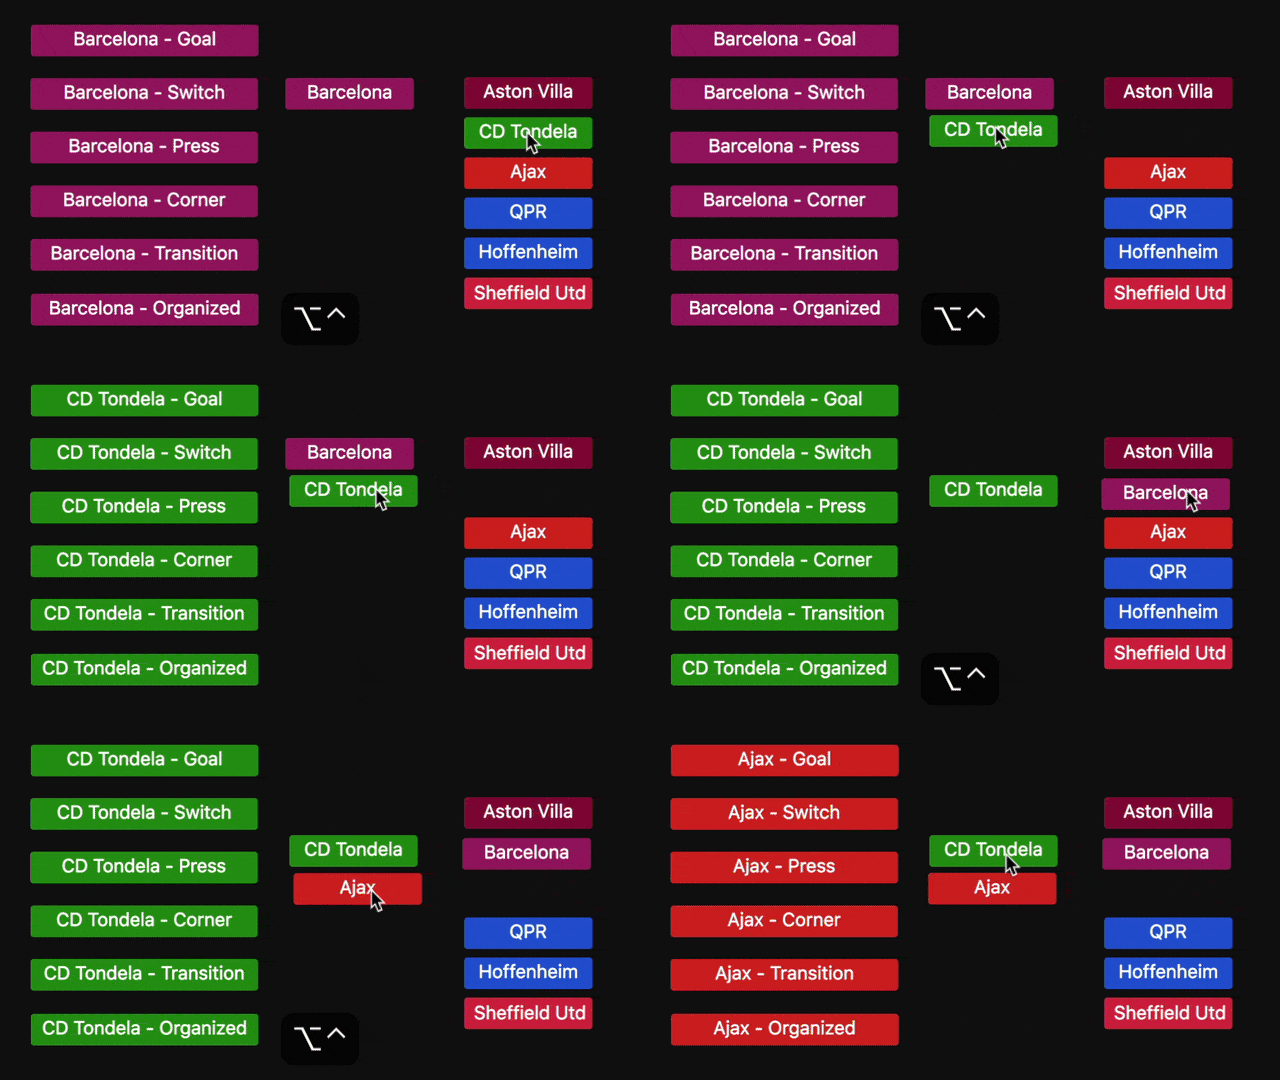 Change option for None buttons. Change is a search and replace
feature using two buttons; one 'Change' button is the searcher and the closest
'Change' button is the replacer. Use name or color or both options to search and
replace. When both options are selected, AND will be used in search, so
replacements must match both criteria: Name AND Color.
Change option for None buttons. Change is a search and replace
feature using two buttons; one 'Change' button is the searcher and the closest
'Change' button is the replacer. Use name or color or both options to search and
replace. When both options are selected, AND will be used in search, so
replacements must match both criteria: Name AND Color.
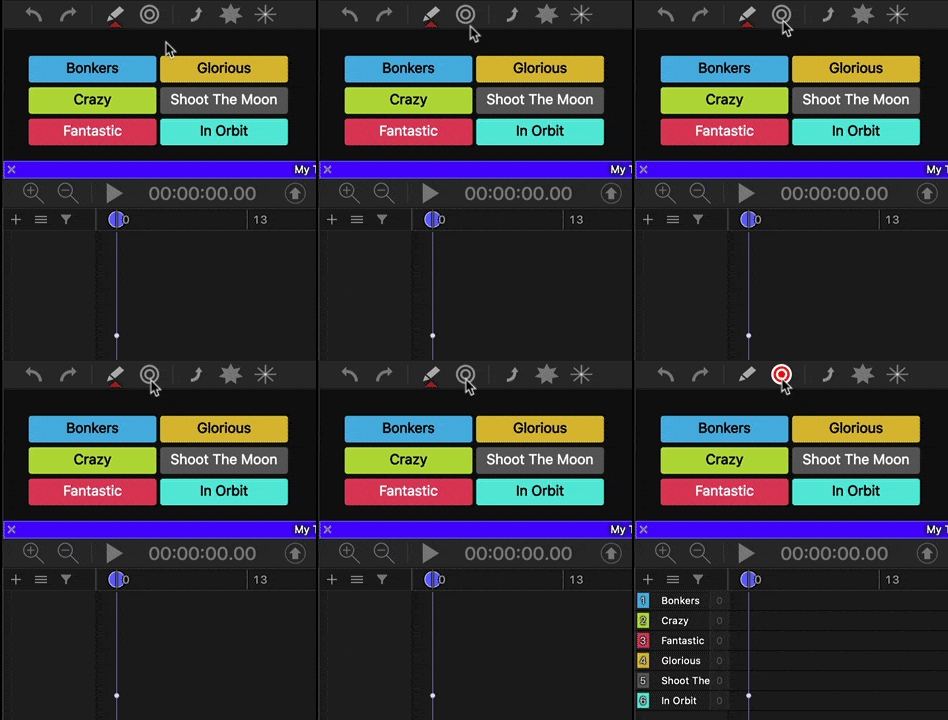 Fill option added to clip type buttons. Selecting this option
will fill the timeline with an empty row when MarkUp mode is engaged. A very
useful feature for adding a bunch of empty rows in the timeline using your MarkUp.
Fill option added to clip type buttons. Selecting this option
will fill the timeline with an empty row when MarkUp mode is engaged. A very
useful feature for adding a bunch of empty rows in the timeline using your MarkUp.
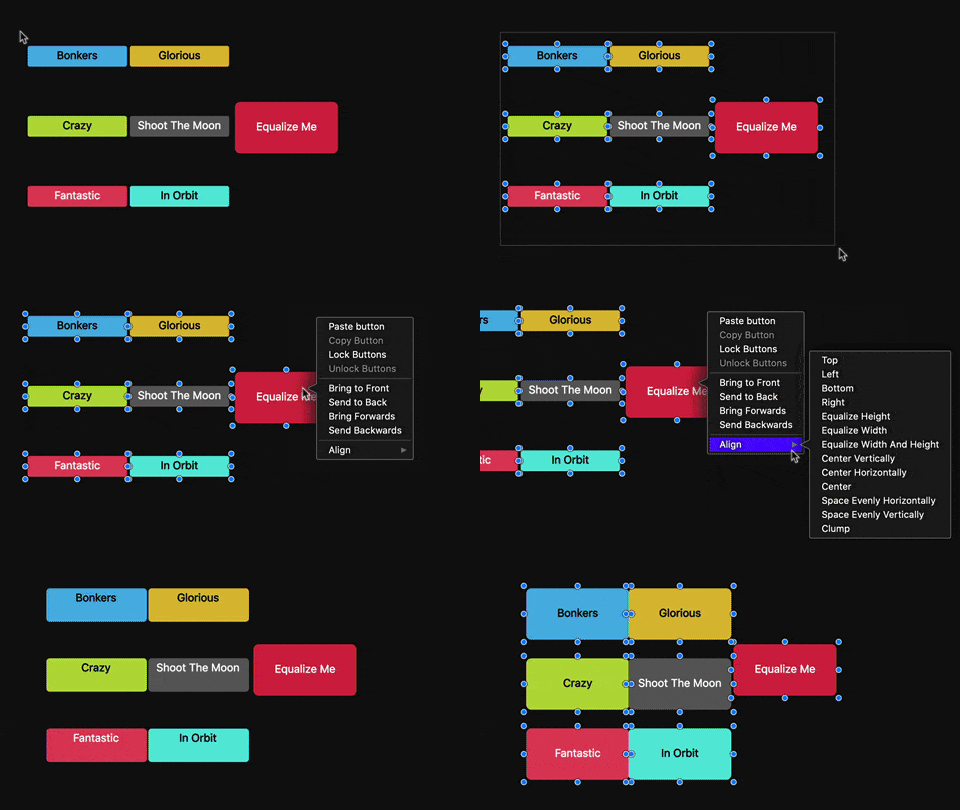 Equalize Width and Height added to the button align menu in the
MarkUp view. This feature will set the width and height for the selected buttons
based on the button that was clicked on to open the menu.
Equalize Width and Height added to the button align menu in the
MarkUp view. This feature will set the width and height for the selected buttons
based on the button that was clicked on to open the menu.
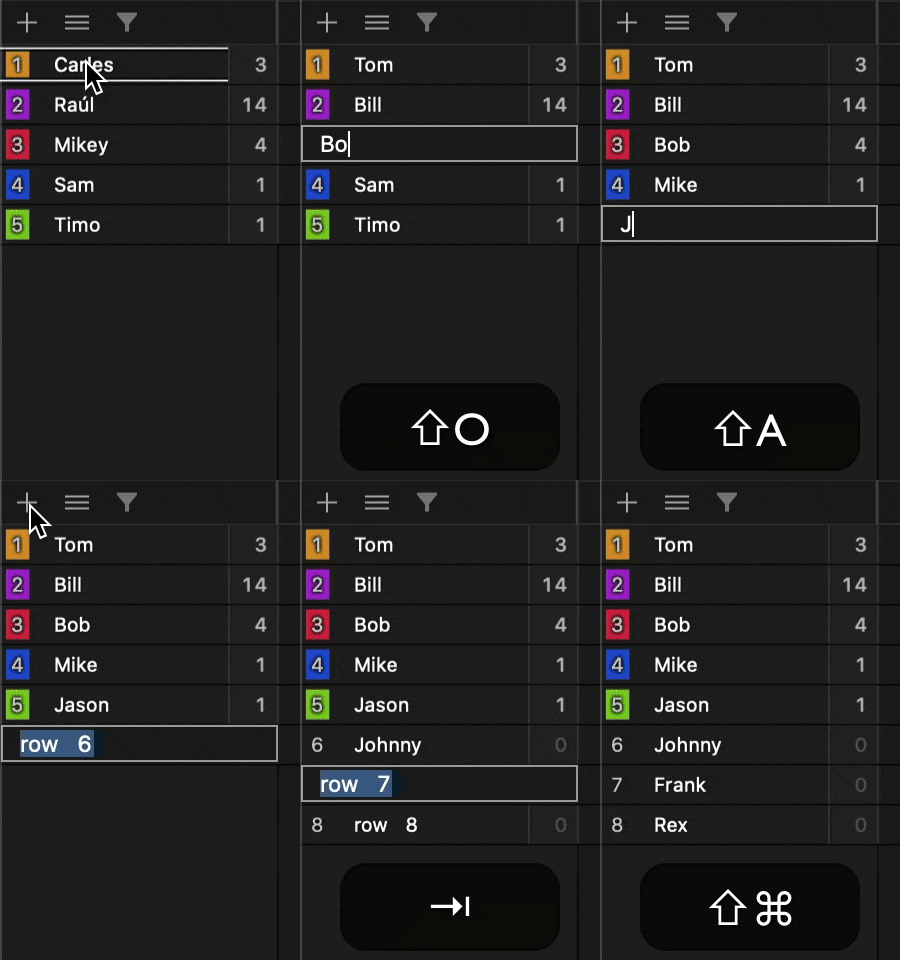 Inline row name editing support added to the timeline! This
feature works similiar to topic name editing in the composer. When a new row
is added using the Add Row button in the timeline or using the shortcut Control R,
the editor will be set to change the name of the row. When in editing mode,
you can press Tab or Shift Tab to move up and down the rows to quickly change
names. Press Return to stop editing or click away from the editor.
Inline row name editing support added to the timeline! This
feature works similiar to topic name editing in the composer. When a new row
is added using the Add Row button in the timeline or using the shortcut Control R,
the editor will be set to change the name of the row. When in editing mode,
you can press Tab or Shift Tab to move up and down the rows to quickly change
names. Press Return to stop editing or click away from the editor.
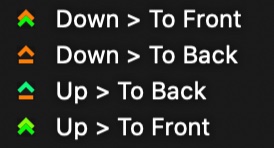 A new set of button actions have been introduced.
 When this feature is selected for multiple buttons that have the same
shortcut key; the button that is closest to the center of the MarkUp
view will be fired. Using this option with Down > Center or
Up > Center button actions can improve the speed in which data capture
can be done. Buttons that have the same hotkey without this option selected
will still be fired off using the shortcut.
When this feature is selected for multiple buttons that have the same
shortcut key; the button that is closest to the center of the MarkUp
view will be fired. Using this option with Down > Center or
Up > Center button actions can improve the speed in which data capture
can be done. Buttons that have the same hotkey without this option selected
will still be fired off using the shortcut.
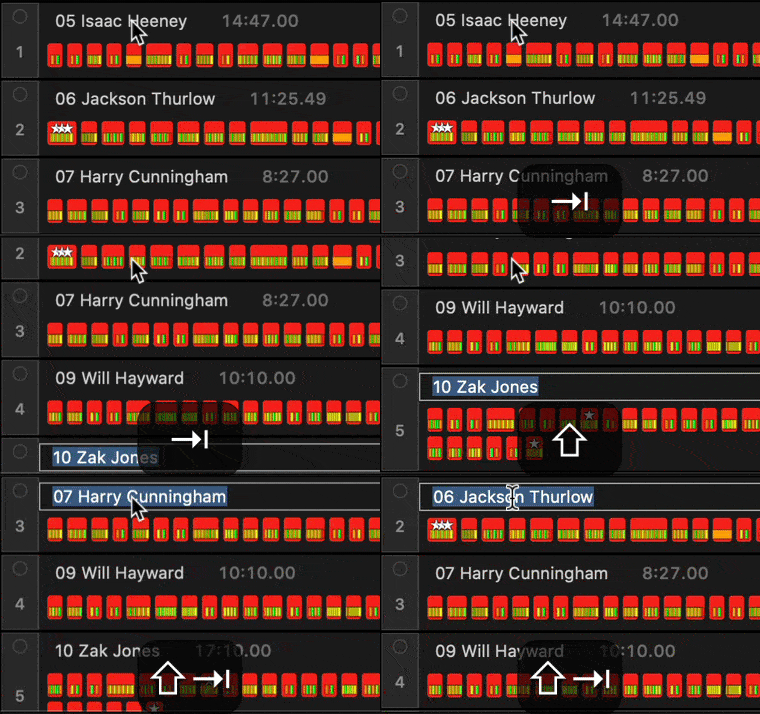 Click and hold on the topic, when the click is released, the topic text is selected
and can be edited. Pressing the Tab key will jump to the next topic down and pressing
Shift Tab will jump to topic above. Press Escape, Return or click away from the text
box to close the inline editor.
Click and hold on the topic, when the click is released, the topic text is selected
and can be edited. Pressing the Tab key will jump to the next topic down and pressing
Shift Tab will jump to topic above. Press Escape, Return or click away from the text
box to close the inline editor.